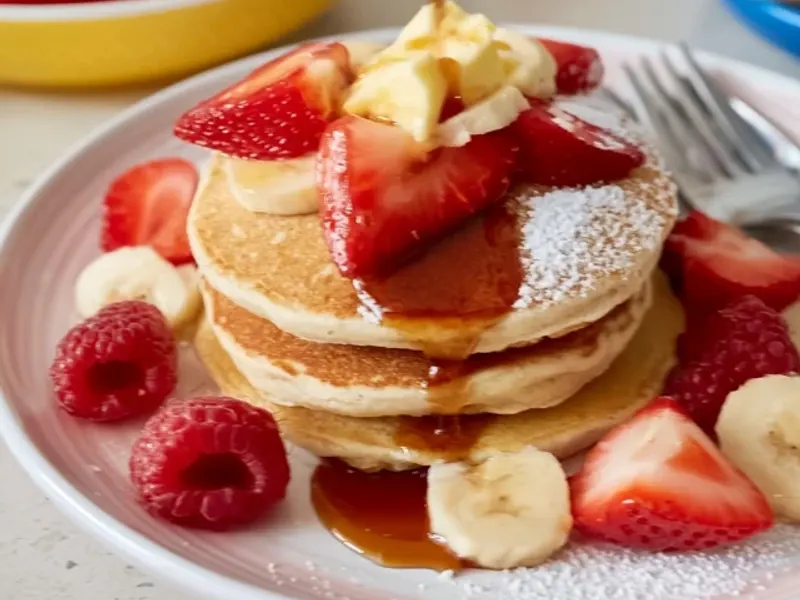
Autism-Friendly Pancakes: Camping Breakfast Made Simple
The first morning at camp is always the loudest. The zippers, the crinkle of sleeping bags, the whistle of a kettle—none of it is bad, but for a child on the autism spectrum, it can be a lot. That's why I keep breakfast simple. These pancakes are soft, mildly sweet, and predictable. No surprise textures, no strong smells, no complicated steps. Just a warm, gentle start to the day.

Why These Pancakes Work for Sensory Needs
Many pancake recipes call for buttermilk, whole wheat flour, or a heavy hand with cinnamon. That's great for some, but not for every camper. This recipe strips it down to the basics. The texture is smooth and uniform—no nuts, no fruit chunks, no crispy edges. The flavor is neutral with a hint of vanilla, so it doesn't overpower a sensitive palate.
The cooking method matters too. I use a medium-low heat and a small ladle, so the pancakes cook evenly without burning. Burnt spots are a common sensory trigger—they're bitter and crunchy in an unexpected way. By keeping the heat gentle, you get a consistent golden brown, every time.
Set Up Your Camp Kitchen for Calm
Before you even mix the batter, think about your cooking space. A cluttered table can feel chaotic. I like to clear a flat area and lay out my ingredients in the order I'll use them: dry stuff on the left, wet stuff in the middle, cooking tools on the right. This visual order helps me stay focused, and it lets my child see what's happening without being overwhelmed.
If you're using a camp stove, place it on a stable, level surface. A wobbly stove is a safety hazard and can cause uneven cooking. I always check that the propane tank is connected properly and the burner is clean before lighting. And remember: never use a stove inside a tent. Carbon monoxide is invisible and deadly.
The Batter: Smooth and Simple
The key to a smooth batter is to whisk the dry ingredients well before adding the wet. This gets rid of lumps without overmixing. Overmixing develops gluten, which makes pancakes chewy and rubbery—not what we want. I stir just until the flour disappears, then let the batter rest for five minutes. This rest period is a game-changer. It lets the flour absorb the liquid, creating a softer, more tender pancake.
If your child is sensitive to the smell of eggs, you can use a flax egg instead. Mix one tablespoon of ground flaxseed with three tablespoons of water, let it sit for five minutes, and use it in place of the egg. The texture will be slightly denser but still soft.
Cooking Without the Stress
Start with a clean, dry skillet. Add a small pat of butter or a drizzle of oil, and spread it with a paper towel. You want a thin, even coating—too much oil can make the edges crispy, which might not be welcome. Pour about a quarter cup of batter per pancake. I use a measuring cup with a handle, so it's easy to pour without splashing.
Wait until bubbles form on the surface and pop slowly. That's your sign to flip. If you flip too early, the pancake will be raw in the middle. Too late, and it might burn. With medium-low heat, you'll have a comfortable window of about two to three minutes per side.
Keep the cooked pancakes under a clean kitchen towel. This traps just enough steam to keep them warm and soft, but not so much that they get soggy. If you're cooking for a crowd, you can also place them on a plate over a pot of simmering water—just make sure the plate is heat-safe.
Adapting for Wind and Weather
Camping breakfasts often happen in less-than-ideal conditions. A gust of wind can cool your skillet fast. Use a windscreen if your stove allows it, or position the stove so the wind is at your back. If it's cold, keep your batter bowl covered between pours—cold batter cooks more slowly and can lead to uneven results.
In hot weather, the butter might melt before you're ready. Keep it in a small insulated bag or a cooler until you need it. And if rain is threatening, set up a tarp over your cooking area. A dry cooking space is a happy cooking space.
Letting Your Child Lead
The best part of this recipe is that it invites participation. Let your child measure the flour or pour the milk. If they're not interested, that's okay too. The goal is a calm breakfast, not a perfect one. Serve the pancakes with syrup on the side, or let everyone add their own toppings. Some kids like a little butter, some like none at all. Give them the choice.
A Simple Takeaway
Autism-friendly pancakes aren't about fancy ingredients or elaborate techniques. They're about creating a predictable, soothing meal that fits into the rhythm of a camping morning. Once you've made these a few times, you'll find your own flow—maybe you'll add a whisper of cinnamon, or skip the sugar entirely. The recipe is a starting point, not a rulebook. What matters most is that everyone at the table feels safe, fed, and ready for the day.
Frequently Asked Questions
Can I make these pancakes ahead of time?
Yes. Cook them at home, let them cool completely, and stack with parchment paper between each. Store in a sealed container or zip-top bag. At camp, reheat on a skillet over low heat for about 30 seconds per side, or wrap in foil and warm near the fire (not directly in flames).
What if my child prefers no syrup?
That's fine. These pancakes are lightly sweet on their own. You can offer plain, or try a small side of applesauce or a drizzle of honey if tolerated. Let your child choose what goes on top—control helps reduce mealtime stress.
How do I keep pancakes warm while cooking more?
Place cooked pancakes on a plate and cover with a clean kitchen towel or a large inverted bowl. They'll stay warm for about 10 minutes. If the stack gets too hot, it can create steam and make them soggy, so keep the towel loose.
Autism-Friendly Pancakes: Camping Breakfast Made Simple

Soft, mildly sweet pancakes with a smooth texture, made with simple ingredients and a gentle cooking method—ideal for campers who prefer predictable, low-sensory meals.
- 1.5 cups all-purpose flour
- 2 tablespoons granulated sugar (optional, for slight sweetness)
- 1 tablespoon baking powder
- 0.5 teaspoon salt
- 1.25 cups milk (any kind works; oat or almond for dairy-free)
- 1 large egg
- 2 tablespoons melted butter or neutral oil (plus extra for the pan)
- 1 teaspoon vanilla extract (optional, for mild flavor)
- In a medium bowl, whisk together the flour, sugar, baking powder, and salt. Make sure there are no lumps.
- In a separate bowl, beat the egg, then add the milk, melted butter (or oil), and vanilla. Whisk until combined.
- Pour the wet ingredients into the dry ingredients. Stir gently with a spoon or whisk until just combined. A few small lumps are okay—do not overmix, or the pancakes will be tough.
- Let the batter rest for 5 minutes. This helps the flour absorb the liquid and makes the pancakes softer.
- Heat a skillet or griddle over medium-low heat. Add a small amount of butter or oil and spread it around.
- Pour about 1/4 cup of batter per pancake. Cook until bubbles form on the surface and the edges look set, about 2-3 minutes.
- Flip and cook for another 1-2 minutes, until golden brown and cooked through. Repeat with the remaining batter, adding more butter or oil as needed.
- Serve warm, with syrup on the side or plain. Let everyone choose their own toppings.
Recipe: Autism-Friendly Pancakes: Camping Breakfast Made Simple
Ingredients
- 1.5 cups all-purpose flour
- 2 tablespoons granulated sugar (optional, for slight sweetness)
- 1 tablespoon baking powder
- 0.5 teaspoon salt
- 1.25 cups milk (any kind works; oat or almond for dairy-free)
- 1 large egg
- 2 tablespoons melted butter or neutral oil (plus extra for the pan)
- 1 teaspoon vanilla extract (optional, for mild flavor)
Instructions
- In a medium bowl, whisk together the flour, sugar, baking powder, and salt. Make sure there are no lumps.
- In a separate bowl, beat the egg, then add the milk, melted butter (or oil), and vanilla. Whisk until combined.
- Pour the wet ingredients into the dry ingredients. Stir gently with a spoon or whisk until just combined. A few small lumps are okay—do not overmix, or the pancakes will be tough.
- Let the batter rest for 5 minutes. This helps the flour absorb the liquid and makes the pancakes softer.
- Heat a skillet or griddle over medium-low heat. Add a small amount of butter or oil and spread it around.
- Pour about 1/4 cup of batter per pancake. Cook until bubbles form on the surface and the edges look set, about 2-3 minutes.
- Flip and cook for another 1-2 minutes, until golden brown and cooked through. Repeat with the remaining batter, adding more butter or oil as needed.
- Serve warm, with syrup on the side or plain. Let everyone choose their own toppings.