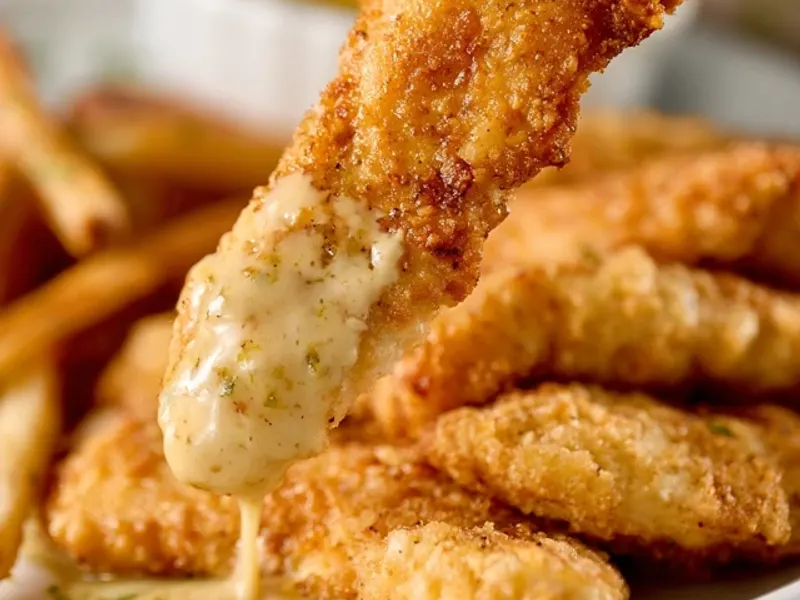
Campfire Chicken Tenders That Please Picky Eaters
The smell of campfire smoke mingles with the sizzle of a hot skillet. You pull out a golden-brown tender, crisp on the outside, juicy inside. The kids stop fiddling with sticks and actually sit down to eat. That's the magic of a well-made chicken tender at camp.

Fussy eaters can turn a camping trip into a mealtime battle. But chicken tenders are a universal peace offering. The trick is getting them right over a fire or camp stove, without turning them into dry, burnt disappointment. Here's how to do it, step by step, with a few camp-specific tricks you won't find in a typical recipe.
Why Chicken Tenders Work at Camp
Chicken tenders are forgiving. They cook fast, take on flavor well, and are easy for little hands to hold. But the real secret is in the coating and the cooking method. A simple flour-and-panko crust gives you that satisfying crunch, while a quick sear keeps the meat tender.
At camp, you have two main options: a cast iron skillet over the fire or a camp stove, or foil packets. Both work, but they give different results. The skillet gives you crispy edges; the foil packet gives you juicy, steamed tenders. I'll show you both.
Prep at Home, Cook at Camp
Do the messy work before you leave. At home, trim any excess fat, pat the tenders dry, and season them with a little salt and pepper. Then set up a dredging station: flour in one container, beaten eggs in another, panko in a third. Coat each tender and place them on a parchment-lined tray. Freeze for 30 minutes so the coating sets, then transfer to a zip-top bag. This prevents the breading from sliding off during transport.
At camp, just pull them out, let them sit for 10 minutes, and cook. This saves you from juggling bowls and flour at a picnic table. Plus, it keeps your campsite cleaner and less attractive to critters.
The Two-Zone Fire Trick
If you're cooking over an open fire, don't just throw the skillet on the flames. Build a two-zone fire: push the coals to one side, leaving the other side with fewer coals. Place your skillet over the hot zone to sear, then move it to the cooler side to finish cooking. This prevents burning the coating while the inside is still raw.
For a camp stove, use medium-high heat for searing, then reduce to medium-low and cover with a lid or a piece of foil to trap heat. This is the same principle as the two-zone fire, just adapted.
Common Mistake: Overcrowding the Pan
If you pile too many tenders in the skillet, the temperature drops, and they steam instead of crisp. Cook in batches, leaving space between each piece. Keep the cooked ones warm on a plate covered with foil.
Foil Packet Variation for Fuss-Free Cleanup
If you want zero dishes, go the foil packet route. Tear off a sheet of heavy-duty foil (about 12x18 inches). Place one or two tenders in the center, add a pat of butter and a sprinkle of your seasonings. Fold the foil into a packet, sealing the edges tightly. Place the packets over medium coals or on a grill grate, and cook for 15–20 minutes, flipping once halfway.
This method is perfect for picky eaters because you can customize each packet. One kid gets plain, another gets a little honey drizzle, another gets extra paprika. No cross-contamination of flavors.
Dipping Sauces That Win Over Kids
Dipping sauce can make or break a meal for a fussy eater. Bring a few small squeeze bottles with different options: ketchup, honey mustard, ranch, or BBQ sauce. Let the kids choose their own. It gives them a sense of control, which often makes them more willing to try the food.
Make a quick honey mustard at camp: mix equal parts honey and yellow mustard. It's simple, but tastes like a treat.
Adapting for Weather and Terrain
Wind can make a camp stove flame sputter. Set up a windbreak using a cooler or a camp table on the windward side. If it's raining, cook under the vestibule of your tent, but never inside the tent itself. Always keep a fire extinguisher or a bucket of water nearby, and follow local fire regulations.
If it's particularly cold, the oil might not get hot enough. Let the skillet heat longer before adding the tenders. You can also pre-warm the oil in a small pot on the fire.
Safety Notes for Cooking at Camp
Always cook in a well-ventilated area, never inside a tent. Carbon monoxide is a silent danger. Keep children a safe distance from the fire and skillet. Use long-handled tongs to turn the tenders. And when you're done, make sure the fire is completely out—douse with water, stir ashes, and douse again.
Store any leftover raw chicken in a sealed container in a cooler with ice. Keep it separate from cooked food. Wash your hands after handling raw chicken, and use a separate cutting board if you're prepping at the campsite.
Takeaway
Chicken tenders are a camping staple for good reason. They're easy, familiar, and when cooked right, they please even the pickiest eater. With a little prep at home and a two-zone fire trick, you can serve up crispy, juicy tenders that make everyone happy. And if the kids still don't eat? At least you have leftovers for a midnight snack by the fire.
Frequently Asked Questions
How do I keep chicken tenders from drying out over a campfire?
Use a two-zone fire: push coals to one side so you have a hot zone and a cooler zone. Sear the tenders over the hot zone for 2–3 minutes per side, then move them to the cooler side, cover with a lid or foil, and let them finish gently. This keeps them juicy without burning the outside.
Can I prep chicken tenders at home for camping?
Yes. Marinate or bread the tenders at home, then store them in a sealed container or zip-top bag in a cooler with ice. Use them within 24 hours. At camp, just cook them as usual. This saves time and keeps your campsite clean.
What's the easiest way to cook chicken tenders for a crowd at camp?
Foil packets are your best friend. Lay each tender on a sheet of heavy-duty foil, add a pat of butter and your seasonings, wrap tightly, and cook over medium coals for 15–20 minutes, flipping once. They come out tender and are easy to serve with no cleanup.
Campfire Chicken Tenders That Please Picky Eaters

Crispy, juicy chicken tenders cooked in a cast iron skillet over a campfire or camp stove, with a simple flour-and-panko coating that picky eaters love.
- 1 pound chicken tenders (about 8–10 pieces)
- 1 cup all-purpose flour
- 1 cup panko breadcrumbs (or regular breadcrumbs)
- 1 teaspoon garlic powder
- 1 teaspoon paprika (optional, for color)
- 1/2 teaspoon salt
- 1/4 teaspoon black pepper
- 2 large eggs (beaten)
- 2 tablespoons olive oil or butter (for cooking)
- Pat the chicken tenders dry with a paper towel. This helps the coating stick and ensures crispiness.
- In a shallow bowl, mix the flour, garlic powder, paprika, salt, and pepper.
- Place the beaten eggs in a second bowl, and the panko in a third.
- Dredge each tender in the flour mixture, shake off excess, then dip in egg, then coat with panko. Press gently so the crumbs adhere.
- Set the tenders on a plate while you heat a cast iron skillet over medium-high heat with the oil or butter.
- Once the oil shimmers, add the tenders in a single layer. Cook for 3–4 minutes per side, until golden brown and cooked through (internal temperature 165°F). Work in batches if needed.
- Transfer to a paper-towel-lined plate to drain. Serve warm with ketchup, honey mustard, or your child's favorite dip.
Recipe: Campfire Chicken Tenders That Please Picky Eaters
Ingredients
- 1 pound chicken tenders (about 8–10 pieces)
- 1 cup all-purpose flour
- 1 cup panko breadcrumbs (or regular breadcrumbs)
- 1 teaspoon garlic powder
- 1 teaspoon paprika (optional, for color)
- 1/2 teaspoon salt
- 1/4 teaspoon black pepper
- 2 large eggs (beaten)
- 2 tablespoons olive oil or butter (for cooking)
Instructions
- Pat the chicken tenders dry with a paper towel. This helps the coating stick and ensures crispiness.
- In a shallow bowl, mix the flour, garlic powder, paprika, salt, and pepper.
- Place the beaten eggs in a second bowl, and the panko in a third.
- Dredge each tender in the flour mixture, shake off excess, then dip in egg, then coat with panko. Press gently so the crumbs adhere.
- Set the tenders on a plate while you heat a cast iron skillet over medium-high heat with the oil or butter.
- Once the oil shimmers, add the tenders in a single layer. Cook for 3–4 minutes per side, until golden brown and cooked through (internal temperature 165°F). Work in batches if needed.
- Transfer to a paper-towel-lined plate to drain. Serve warm with ketchup, honey mustard, or your child's favorite dip.