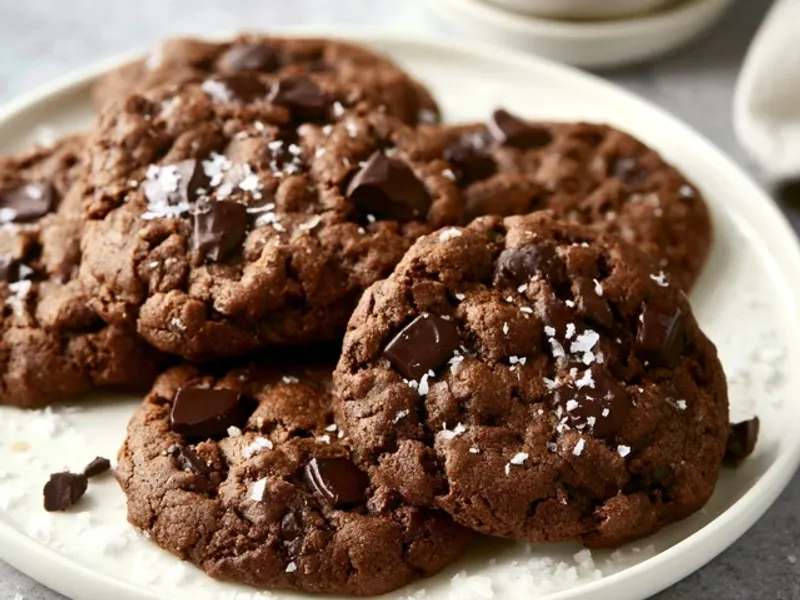
Dairy-Free Kids Cookies for Camping (No-Bake & Bake)
The first time I made these dairy-free cookies for a camping trip, we were sitting around the campfire, and my youngest kept asking for 'one more, please.' The next morning, they were gone—every crumb. That’s when I knew I had to share this recipe. These cookies are not only allergy-friendly, but they’re also sturdy enough to survive a bumpy trail ride and simple enough to make right at the campsite.

Why Dairy-Free Cookies Are a Camping Win
Camping with kids means packing snacks that are filling, mess-free, and—most importantly—safe for everyone. Dairy-free cookies solve the allergy problem without sacrificing taste. They’re also a great energy boost for hiking, and they don’t melt like chocolate bars or squish like fruit. Plus, making them ahead of time saves you from buying overpriced, overly processed snacks at the camp store.
Here’s the trick most people miss: use a sturdy cookie recipe that holds its shape in warm weather. Soft, gooey cookies turn into a sticky mess in a backpack. These no-bake oat cookies are dense and firm, so they stay intact even in a warm tent.
The No-Bake Dairy-Free Cookie Recipe
This is my go-to recipe for camping because it requires no oven—just a pot, a spoon, and a few pantry staples. If you have a camp stove, you can even make it fresh at the site. If not, bake them at home and pack them.
I’ve included the full recipe card below, but here are a few tips I’ve learned through trial and error:
- Use sunflower seed butter instead of peanut butter for a nut-free option that’s still creamy. Tahini works too, but it has a stronger flavor.
- Coconut oil is your best friend—it solidifies at room temperature, which helps the cookies set without refrigeration.
- Don’t skip the parchment paper—it saves you from scraping sticky oats off your hands and your table.
Packing and Storage Tips
Once your cookies are cool, pack them in a rigid container—a metal tin or a hard plastic box works best. Layer parchment paper between cookies to prevent sticking. Fill any empty spaces with a clean dish towel to keep them from rattling around. This simple method ensures they arrive at camp looking as good as they taste.
If you’re hiking in, freeze the cookies the night before. They’ll thaw by lunchtime and stay cool in your pack for hours—a sneaky way to keep them fresh.
Baking Dairy-Free Cookies at Camp (If You Must)
Sometimes you want the smell of fresh cookies at camp. You can do it, but you need the right gear. A foldable Dutch oven or a heavy skillet with a tight lid works on a camp stove. Place the stove on a stable, heat-proof surface, away from tent walls and dry leaves. Use a low flame and rotate the pan every 5 minutes to avoid hot spots. Check doneness with a toothpick—if it comes out clean, they’re done.
Safety note: Never use a camp stove inside a tent or enclosed space—carbon monoxide is a real risk. Always cook outside, and keep kids a safe distance from the stove.
For a simpler camp-baking hack, try making these cookies as bars. Press the mixture into a parchment-lined skillet, cover, and cook on low for 20 minutes. Let them cool before cutting. Same great taste, less fuss.
Kid-Friendly Variations
Kids have strong opinions about cookies. Here’s how to adapt:
- Add mix-ins: Stir in dairy-free chocolate chips, dried cranberries, or shredded coconut after removing from heat.
- Make them fun: Use cookie cutters to press shapes into the mixture before it sets—stars, bears, whatever your kids love.
- Reduce sugar: Swap maple syrup for mashed ripe banana (about 1/2 cup) for a less sweet, more filling cookie. You’ll need to add a bit more oats to compensate.
Common Mistakes to Avoid
I’ve made these cookies more times than I can count, and I’ve seen a few pitfalls:
- Boiling the mixture: You’ll get a grainy texture and a burnt taste. Keep the heat low and stir constantly.
- Using instant oats: They absorb too much liquid and turn to mush. Stick with old-fashioned rolled oats.
- Packing them while warm: They’ll stick together into one big blob. Let them cool completely, or even chill them in a cooler for 10 minutes before packing.
Final Thoughts
Dairy-free cookies are a simple way to keep kids happy and well-fed on a camping trip. They’re forgiving, portable, and endlessly adaptable. Whether you bake them at home or try your hand at camp-stove baking, these cookies will become a family favorite. So next time you’re planning a trip, whip up a batch. Your kids—and their taste buds—will thank you.
Frequently Asked Questions
Can I make dairy-free cookies ahead of time for camping?
Yes, most dairy-free cookie recipes bake well at home and stay fresh for 3–4 days in an airtight container. For longer trips, freeze them and pack them frozen—they’ll thaw naturally by day two.
What’s the best way to keep cookies from crumbling in a backpack?
Pack them in a rigid, airtight container (like a metal tin or hard plastic box) with parchment paper between layers. Fill any empty space with a clean kitchen towel to absorb bumps. Avoid soft-sided bags—cookies will crush.
Can I bake dairy-free cookies on a camp stove?
Yes, with a camp stove and a foldable Dutch oven or a heavy skillet with a tight lid. Use a low flame and rotate the pan every 5 minutes to avoid burning. Always place the stove on a stable, heat-proof surface and keep children away.
Dairy-Free Kids Cookies for Camping (No-Bake & Bake)

These no-bake dairy-free cookies are perfect for camping—no oven needed, just a pot and a stove. Made with oats, cocoa, coconut oil, and sunflower seed butter, they’re a quick, energy-packed treat for kids.
- 1/2 cup coconut oil (or vegan butter) (solid at room temperature)
- 1/2 cup unsweetened cocoa powder (or carob powder)
- 1/2 cup sunflower seed butter (or tahini) (no dairy, nut-free option)
- 1/2 cup maple syrup (or honey for non-vegan)
- 2 cups old-fashioned rolled oats (not instant)
- 1 teaspoon vanilla extract (optional)
- 1/4 teaspoon sea salt (to balance sweetness)
- Line a baking sheet or flat plate with parchment paper. Set aside.
- In a medium saucepan, combine coconut oil, cocoa powder, sunflower seed butter, and maple syrup. Warm over low heat, stirring constantly, until fully melted and smooth. Do not boil.
- Remove from heat. Stir in vanilla and sea salt, then add oats. Mix until every oat is coated.
- Scoop tablespoon-sized portions and drop onto the prepared sheet. Gently press each cookie flat with the back of a spoon.
- Let cool at room temperature for about 20 minutes until set. If it's warm out, pop them in a cooler for 10 minutes to firm up.
- Store in an airtight container with parchment between layers. They keep for up to a week at camp (if they last that long!).
Recipe: Dairy-Free Kids Cookies for Camping (No-Bake & Bake)
Ingredients
- 1/2 cup coconut oil (or vegan butter) (solid at room temperature)
- 1/2 cup unsweetened cocoa powder (or carob powder)
- 1/2 cup sunflower seed butter (or tahini) (no dairy, nut-free option)
- 1/2 cup maple syrup (or honey for non-vegan)
- 2 cups old-fashioned rolled oats (not instant)
- 1 teaspoon vanilla extract (optional)
- 1/4 teaspoon sea salt (to balance sweetness)
Instructions
- Line a baking sheet or flat plate with parchment paper. Set aside.
- In a medium saucepan, combine coconut oil, cocoa powder, sunflower seed butter, and maple syrup. Warm over low heat, stirring constantly, until fully melted and smooth. Do not boil.
- Remove from heat. Stir in vanilla and sea salt, then add oats. Mix until every oat is coated.
- Scoop tablespoon-sized portions and drop onto the prepared sheet. Gently press each cookie flat with the back of a spoon.
- Let cool at room temperature for about 20 minutes until set. If it's warm out, pop them in a cooler for 10 minutes to firm up.
- Store in an airtight container with parchment between layers. They keep for up to a week at camp (if they last that long!).