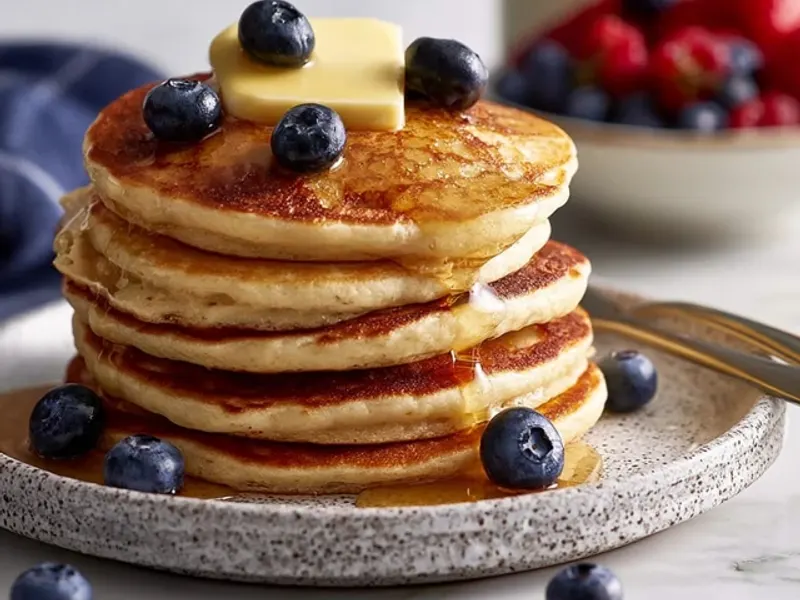
Dairy-Free Kids Pancakes for Camping Made Easy
The morning air is crisp, and the smell of coffee mingles with the earthy scent of pine. Your kids are still rubbing sleep from their eyes, but the promise of pancakes gets them unzipping their sleeping bags faster than anything else. If dairy is off the table, you might feel a little stuck—but you don't have to be. These dairy-free kids pancakes are fluffy, forgiving, and perfect for a campsite breakfast.

Why Dairy-Free Works at Camp
Dairy-free pancakes are actually a natural fit for camping. No butter to keep cold, no milk to spoil in the cooler. You can mix the dry ingredients at home, stash them in a jar, and just add water and oil at the campsite. That means less to pack, less to chill, and less to worry about.
The trick is to use a liquid that brings a little richness. Almond milk, oat milk, or even coconut milk all work beautifully. Oat milk gives a slightly creamier texture, while almond milk keeps things light. If you have a kid who's allergic to nuts, oat milk is your friend.
The Mix-Ahead Hack
Here's the tip that will change your camping mornings: make a big batch of the dry mix at home. Combine the flour, sugar, baking powder, baking soda, and salt in a labeled mason jar or a zip-top bag. At camp, you just add the wet ingredients—no measuring cups for the dry stuff, no messy spills.
I usually make enough for two mornings, so I have a backup for that inevitable day when everyone wakes up hungrier than expected. Write the wet ingredient amounts on the jar with a permanent marker or a piece of tape. Future you will be grateful.
Cast Iron vs. Non-Stick
If you have a cast iron skillet, this is its moment to shine. Cast iron holds heat evenly, which means your pancakes cook uniformly—no burnt edges with a raw center. The key is to preheat it slowly over medium-low heat for at least five minutes before you pour any batter.
Test the heat with a few drops of water. If they sizzle and evaporate, you're ready. If they dance and skitter, it's too hot—turn it down. Cast iron takes a little patience, but the payoff is a golden, crisp-edged pancake that flips like a dream.
No cast iron? A non-stick griddle works fine, just keep the heat a touch lower to avoid scorching.
The Common Mistake to Avoid
Overmixing. I know it's tempting to stir until the batter looks smooth, but that's exactly what makes pancakes tough. The gluten in the flour develops as you stir, and overworking it turns your fluffy morning into a chewy disappointment. Mix just until the dry ingredients are moistened—lumps are perfectly fine.
Another mistake is flipping too early. Wait until you see bubbles on the surface and the edges look set. Then flip once, and only once. Pressing down on the pancake with your spatula is a sure way to deflate all that lovely air.
Keeping Them Warm
If you're cooking for a crowd, the first batch will be cold by the time the last one is done. Here's how to keep everyone happy: place the cooked pancakes on a plate and cover with a clean kitchen towel or a piece of foil. Set the plate near the stove but not directly on it—you want gentle warmth, not steam.
Another camp trick is to put a warm water bottle (the kind you'd use for a chilly night) in a small cooler, then nestle the plate of pancakes on top. It's a low-tech warming drawer that works surprisingly well.
Adapting for Wind, Rain, and Cold
Wind is the enemy of a camp stove. If the breeze is strong, set up a windbreak using your cooler or a camp chair. A folding windscreen made for camp stoves is a worthwhile investment—it cuts cooking time significantly.
Rain? Cook under the vestibule of your tent, but never inside the tent itself. Carbon monoxide from a camp stove is a real danger in an enclosed space. Keep the vestibule open for ventilation, and set up a tarp overhead if you need more coverage.
Cold mornings mean the pan might take longer to heat. Give it a few extra minutes and keep the batter covered between batches so it doesn't chill.
Making It a Kid-Friendly Activity
Let the kids help. Measuring the wet ingredients, stirring the batter (just until combined), and pouring the first pancake are all fine motor skills disguised as fun. My kids love to watch the bubbles form and pop on the surface—it's a tiny science lesson with a tasty reward.
For picky eaters, cut the pancakes into fun shapes using a cookie cutter, or add a few dairy-free chocolate chips to the batter for a special treat. Just remember to check that your chocolate chips are dairy-free—some brands aren't.
Safety Notes
Always keep a fire extinguisher or a bucket of water nearby when cooking with a camp stove. Make sure the stove is on a stable, level surface, and never leave it unattended while lit.
Store any leftover pancakes in a sealed container in the cooler. They're great for a quick snack later, and they reheat well over a low flame or in a skillet with a little oil.
The Takeaway
Dairy-free pancakes at camp don't have to be a compromise. With a simple mix-ahead strategy, a hot cast iron pan, and a little patience, you can serve up a stack of golden, fluffy pancakes that will make your kids forget they're eating dairy-free at all. The best part? The only thing you'll have to wash is the pan—and that's a win in anyone's book.
Frequently Asked Questions
Can I make this dairy-free pancake mix ahead of time?
Absolutely. Combine all dry ingredients in a labeled mason jar or zip-top bag at home. At camp, just add the wet ingredients (water, oil, and egg if using) and stir. This saves prep time and reduces mess.
What's the best way to cook pancakes on a camp stove?
Use a cast iron skillet or a non-stick griddle over medium-low heat. Let it preheat for a few minutes, then test with a drop of water—if it sizzles, it's ready. Cook until bubbles form on top and edges look set, then flip once. Avoid pressing down on the pancakes.
How do I keep pancakes warm for a crowd at camp?
Place cooked pancakes on a plate and cover with a clean kitchen towel or aluminum foil. Set the plate near the stove or on a warm (but not hot) spot to keep them warm while you cook the rest. You can also keep them in a cooler with a warm water bottle wrapped in a towel.
Dairy-Free Kids Pancakes for Camping Made Easy

Fluffy, dairy-free pancakes that come together easily at the campsite. Use a pre-mixed dry blend and simple swaps for a kid-approved breakfast that’s gentle on tummies.
- 1.5 cups all-purpose flour
- 2 tbsp granulated sugar (or coconut sugar)
- 2 tsp baking powder
- 0.5 tsp baking soda
- 0.5 tsp salt
- 1.25 cups unsweetened almond milk (or oat milk)
- 2 tbsp neutral oil (like canola or melted coconut oil)
- 1 tsp vanilla extract (optional)
- 1 large egg (optional, for fluffier texture; omit for vegan)
- In a large bowl, whisk together the flour, sugar, baking powder, baking soda, and salt.
- In a separate bowl or large liquid measuring cup, whisk the almond milk, oil, vanilla (if using), and egg (if using) until well combined.
- Pour the wet ingredients into the dry ingredients and stir gently with a fork until just combined. A few lumps are fine—do not overmix.
- Heat a cast iron skillet or non-stick griddle over medium-low heat. Add a small pat of dairy-free butter or a drizzle of oil to coat the surface.
- Pour about 1/4 cup of batter per pancake onto the hot surface. Cook until bubbles form on the surface and the edges look set, about 2–3 minutes.
- Flip carefully and cook for another 1–2 minutes, until golden brown and cooked through.
- Serve warm with maple syrup, fresh fruit, or a sprinkle of cinnamon. Keep cooked pancakes warm under a towel while you finish the batch.
Recipe: Dairy-Free Kids Pancakes for Camping Made Easy
Ingredients
- 1.5 cups all-purpose flour
- 2 tbsp granulated sugar (or coconut sugar)
- 2 tsp baking powder
- 0.5 tsp baking soda
- 0.5 tsp salt
- 1.25 cups unsweetened almond milk (or oat milk)
- 2 tbsp neutral oil (like canola or melted coconut oil)
- 1 tsp vanilla extract (optional)
- 1 large egg (optional, for fluffier texture; omit for vegan)
Instructions
- In a large bowl, whisk together the flour, sugar, baking powder, baking soda, and salt.
- In a separate bowl or large liquid measuring cup, whisk the almond milk, oil, vanilla (if using), and egg (if using) until well combined.
- Pour the wet ingredients into the dry ingredients and stir gently with a fork until just combined. A few lumps are fine—do not overmix.
- Heat a cast iron skillet or non-stick griddle over medium-low heat. Add a small pat of dairy-free butter or a drizzle of oil to coat the surface.
- Pour about 1/4 cup of batter per pancake onto the hot surface. Cook until bubbles form on the surface and the edges look set, about 2–3 minutes.
- Flip carefully and cook for another 1–2 minutes, until golden brown and cooked through.
- Serve warm with maple syrup, fresh fruit, or a sprinkle of cinnamon. Keep cooked pancakes warm under a towel while you finish the batch.