Easy Kids Energy Balls for Camping (No-Bake)
The first time I made energy balls for a camping trip, I was skeptical. Would they survive the drive? Would they turn into a sticky mess in the afternoon heat? But after a few trial runs, I found the secret: a quick melt of the peanut butter and honey before mixing. That small step makes all the difference—it helps the balls hold their shape, even when the sun beats down on the picnic table.

These little bites are a lifesaver on the trail. They're no-bake, meaning you can make them at home and just pack them. No stove, no cooler required for the first day. And kids love them because they're sweet and chewy—like a cookie you can carry in your pocket.
Why Energy Balls Work for Camping
Energy balls are the perfect camping snack for a few reasons. They're dense, so they pack a lot of energy into a small bite—great for little legs that need a boost on a hike. They don't crumble like granola bars, and they don't melt like chocolate bars (if you make them right). Plus, they're easy to customize with whatever you have in your pantry.
One thing I've learned: keep the balls small. A one-inch ball is just right for a kid's hand. Bigger balls tend to get squished in a backpack, and they take longer to eat, which means more time standing still when you could be exploring.
The Secret to Non-Sticky, Non-Melting Balls
Here's the trick that most recipes don't tell you: melt the peanut butter and honey together in a small saucepan over low heat. Just until they're smooth and slightly runny—maybe 30 seconds. This does two things. First, it blends the flavors better. Second, it makes the mixture less sticky when you roll it, because the honey isn't as thick and tacky.
Let the melted mixture cool for five minutes before mixing with the dry ingredients. If you mix it while it's hot, the chocolate chips will melt and turn everything into a brown mess. Still tasty, but not as pretty.
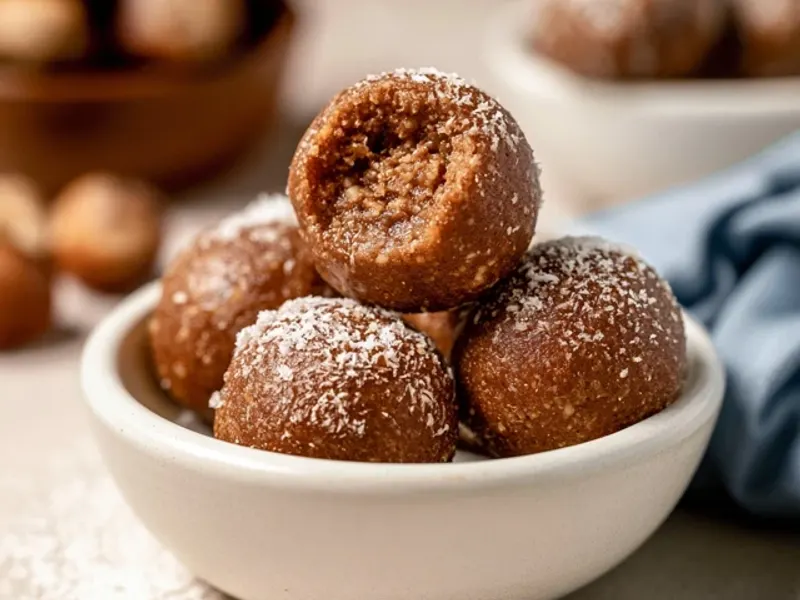
Another tip: roll the balls in a bit of extra oats or shredded coconut. This gives them a dry outer layer that keeps them from sticking to each other in a container. It also adds a nice texture that kids enjoy.
How to Pack and Store at Camp
For a day trip, you can just toss them in a zip-top bag. But for a multi-day camp, use a sturdy, reusable container—a wide-mouth jar or a small plastic tub with a tight lid. Layer them with parchment paper between layers so they don't stick together.
If the weather is hot, keep the container in the cooler during the hottest part of the day. They'll firm up again once they cool down. If they do get a little soft, that's okay—just eat them with a spoon. No one's judging at a campsite.
One more thing: always store food in a sealed container, especially at night. Raccoons and other critters have a keen nose for honey and peanut butter. Keep your snacks in the bear box or your car, not in the tent.
Making Energy Balls with Kids
This is a great recipe to make with children before the trip. They can help measure the ingredients, stir the mixture, and roll the balls. It's a fun kitchen activity that gets them excited about the camping adventure ahead.
To make rolling easier for little hands, give them a small scoop—like a cookie dough scoop. That way, every ball is the same size, and they don't get overwhelmed by a too-big blob. Also, have a bowl of water nearby for dipping fingers. A quick dip stops the sticky mixture from clinging to their palms.
If your child has a nut allergy, swap the peanut butter for sunflower seed butter. It works just as well, though you might need an extra tablespoon of honey to help it bind.
Variations for Picky Eaters
The basic recipe is a blank canvas. Here are a few simple swaps:
- Add dried fruit: Swap the chocolate chips for raisins, dried cranberries, or chopped apricots. They add natural sweetness and a chewy texture.
- Add crunch: Stir in a handful of sunflower seeds or crushed pretzels for a salty-sweet combo.
- Spice it up: A pinch of cinnamon or a dash of nutmeg gives them a warm, cozy flavor that reminds me of campfire treats.
Just keep the total mix ratio the same: about 1 cup of wet ingredients to 1.5 cups of dry ingredients. If you add too many extras, the balls won't hold together.
A Note on Safety
These energy balls are no-bake, so there's no risk of a camp stove fire. But if you make them at home, watch the saucepan closely—honey can burn quickly if left unattended. And when you're at camp, always keep food sealed and out of your tent. You don't want to wake up to a raccoon unzipping your vestibule.
Takeaway
Easy kids energy balls are a camping staple that you can make in minutes and enjoy anywhere. They're sturdy, satisfying, and just sweet enough to feel like a treat. With the melt-first trick and a few packing tips, you'll never have to worry about a sticky mess again. So next time you're planning a trip, whip up a batch—your kids (and your future self) will thank you.
Frequently Asked Questions
How do I keep energy balls from melting in warm weather?
Use a double-boiler method to melt the nut butter and honey, then let the mixture cool slightly before mixing in the dry ingredients. This helps the balls set firmly. Store them in a sealed container in a cooler, or wrap individually in parchment paper and place in a shaded spot. If the balls get soft, pop them in a cooler for 15 minutes before serving.
Can I make energy balls ahead of time for camping?
Absolutely. Make them 1-2 days before your trip and keep them refrigerated. At camp, they'll stay fine in a cooler for the first day, and for day two they're still safe at room temperature if the weather isn't too hot (under 70°F). For longer trips, freeze them and pack them frozen—they'll thaw in the cooler and be ready by day two.
What's the best way to keep energy balls from being too sticky for kids to handle?
After rolling, roll each ball in a little extra oats or shredded coconut. This creates a dry outer layer that prevents sticking. Also, lightly dampen your hands with water before rolling—it stops the mixture from clinging to your palms. And remember, smaller balls (1 inch) are easier for little hands to manage.
Easy Kids Energy Balls for Camping (No-Bake)

These no-bake energy balls are a camping favorite: oats, peanut butter, honey, and chocolate chips rolled into bite-sized snacks. They're sturdy, don't melt in your pack, and are easy enough for kids to help make.
- 1 cup old-fashioned rolled oats (not instant)
- 1/2 cup natural peanut butter (or any nut/seed butter)
- 1/3 cup honey (or maple syrup for vegan)
- 1/2 cup mini chocolate chips (or dried fruit)
- 1 tsp vanilla extract (optional)
- 2 tbsp ground flaxseed (optional, for extra fiber)
- 1/4 tsp salt (if using unsalted nut butter)
- In a large bowl, mix the oats, chocolate chips, flaxseed, and salt (if using).
- In a separate small bowl, stir together the peanut butter, honey, and vanilla until smooth.
- Pour the wet mixture into the dry ingredients and stir until everything is well combined. If the mixture seems too dry, add a teaspoon of water or extra honey.
- Scoop out about 1 tablespoon of the mixture and roll it into a ball. If it sticks to your hands, lightly wet your hands first.
- Place each ball on a plate or tray. Once all are rolled, refrigerate for 15 minutes to firm up (or place in a cooler for 20 minutes).
- Store in an airtight container. They keep at room temperature for 2 days, or up to a week in a cooler.
Recipe: Easy Kids Energy Balls for Camping (No-Bake)
Ingredients
- 1 cup old-fashioned rolled oats (not instant)
- 1/2 cup natural peanut butter (or any nut/seed butter)
- 1/3 cup honey (or maple syrup for vegan)
- 1/2 cup mini chocolate chips (or dried fruit)
- 1 tsp vanilla extract (optional)
- 2 tbsp ground flaxseed (optional, for extra fiber)
- 1/4 tsp salt (if using unsalted nut butter)
Instructions
- In a large bowl, mix the oats, chocolate chips, flaxseed, and salt (if using).
- In a separate small bowl, stir together the peanut butter, honey, and vanilla until smooth.
- Pour the wet mixture into the dry ingredients and stir until everything is well combined. If the mixture seems too dry, add a teaspoon of water or extra honey.
- Scoop out about 1 tablespoon of the mixture and roll it into a ball. If it sticks to your hands, lightly wet your hands first.
- Place each ball on a plate or tray. Once all are rolled, refrigerate for 15 minutes to firm up (or place in a cooler for 20 minutes).
- Store in an airtight container. They keep at room temperature for 2 days, or up to a week in a cooler.