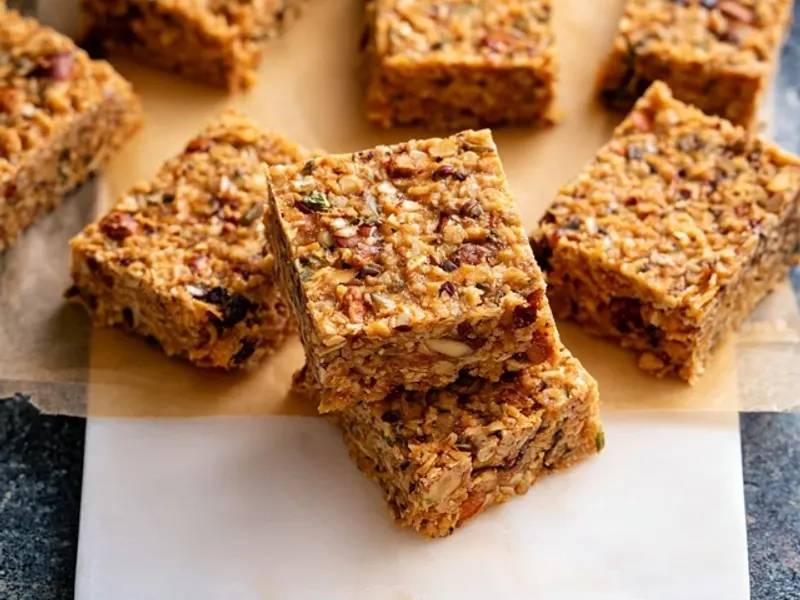
Easy Kids Granola Bars for Camping
The first time I made granola bars for a camping trip, I watched them crumble into a pile of oat dust before we even reached the trailhead. My kids were happy to eat the crumbs, but I wanted something they could hold in one hand while scampering up a rock or pedaling a bike. That's when I started tinkering with a no-bake formula that's sticky enough to stay together, sturdy enough to survive a backpack, and simple enough to make on a weeknight before you head out.

Why Make Your Own Granola Bars for Camping?
Store-bought bars are convenient, but they're often loaded with sugar and wrapped in plastic that you have to pack out. Homemade bars let you control the sweetness, skip the weird additives, and tailor the add-ins to what your kids actually like. Plus, they're a fraction of the cost—perfect when you're feeding a hungry crew all weekend. And because they're no-bake, you don't even need to turn on your oven, which is a blessing on a hot summer day.
The Secret to Bars That Hold Together
There are two common mistakes that lead to crumbly granola bars: not enough sticky binder and not pressing firmly enough. The recipe below uses a combination of honey and peanut butter (or sunflower seed butter) to create a glue that holds every oat in place. When you pour the hot liquid over the dry ingredients, stir until every piece is coated—no dry spots. Then, when you transfer the mixture to the pan, press down with real force. I use the bottom of a measuring cup to compact it evenly. This isn't a gentle pat; you want the mixture to feel dense and almost packed. That pressure is what turns a loose pile into a bar you can snap cleanly.
Make Them Your Own: Mix-In Ideas
Once you have the base recipe down, the variations are endless. For a classic trail mix vibe, add raisins and a handful of sunflower seeds. If your kids love something sweeter, toss in mini chocolate chips—they'll melt slightly and create little pockets of gooeyness. Dried cranberries add a tart pop, and shredded coconut gives a chewy texture. Just keep the total add-ins to about one cup so the bars don't get too bulky and fall apart.
Camping-Specific Tips
When you're packing for a tent camping trip, think about temperature. In the summer, chocolate chips might melt and make the bars messy. Swap them for carob chips or simply skip them. In cooler weather, the bars will stay firm, but they're still fine to keep in a cooler if you want them extra chilled. Wrap each bar individually in parchment paper or a reusable snack bag. That way, you can grab one without unrolling the whole batch, and the wrappers double as a napkin.
How to Make Them Ahead and Store
These bars are perfect make-ahead camping food. I usually whip up a batch two days before we leave and store them in an airtight container in the fridge. They'll keep for up to a week at room temperature, but in a hot campsite, I'd keep them in the cooler to be safe. You can also freeze them for up to three months—just thaw overnight in the fridge before your trip. That means you can batch-cook a few different flavors and have a variety ready for the whole season.
A Note on Safety and Food Storage at Camp
When you're camping, always store food in a sealed container or bear-proof locker if you're in bear country. Granola bars have a sweet smell that can attract wildlife, so never leave them sitting on the picnic table overnight. And if you're hiking with kids, teach them to hold onto their bars and not drop crumbs—it keeps the trail clean and the ants away.
Recipe: No-Bake Chewy Granola Bars
Here's the full recipe. It makes 12 bars, and you can easily double it for a bigger group or a longer trip. The prep time is just 10 minutes, and the hardest part is waiting for them to chill before you cut them. Trust me, it's worth it.
Note: This is a no-bake recipe, so there's no cook time. If you want a crunchier bar, you can toast the oats in a dry skillet for 3-4 minutes before mixing, but it's not necessary.
Takeaway
Homemade granola bars are a game-changer for camping with kids. They're easy to make, easy to pack, and easy to eat—no sticky fingers or wrappers to deal with. The next time you're planning a trip, spend ten minutes making a batch. Your kids will thank you, and you'll have one less thing to buy at the store.
Frequently Asked Questions
How do I keep homemade granola bars from crumbling?
The key is to press the mixture firmly into the pan and let it cool completely before cutting. Also, use enough sticky binder—honey or maple syrup—so the oats and add-ins hold together. If they still crumble, pop them in the fridge for 30 minutes before slicing.
Can I make these granola bars nut-free?
Absolutely. Simply swap the peanut butter for sunflower seed butter or a soy-based alternative. Check that your oats and any mix-ins are certified nut-free if you need to avoid cross-contamination. This makes them school-safe and great for campsites with nut restrictions.
How long do homemade granola bars last on a camping trip?
Stored in an airtight container or zip-top bag, they'll keep for up to a week at room temperature. In warm weather, keep them out of direct sun and in a cooler if your campsite is very hot. They also freeze well for up to 3 months, so you can make them ahead.
Easy Kids Granola Bars for Camping

These no-bake chewy granola bars are packed with oats, honey, and your kids' favorite add-ins. They take 10 minutes to prep and are perfect for camping snacks or quick breakfasts.
- 2 cups old-fashioned rolled oats (not quick oats)
- 1 cup crispy rice cereal (like Rice Krispies)
- 1/2 cup unsalted butter (or coconut oil for dairy-free)
- 1/2 cup honey (or maple syrup)
- 1/3 cup brown sugar (packed)
- 1/2 cup peanut butter (or sunflower seed butter for nut-free)
- 1 teaspoon vanilla extract
- 1/4 teaspoon salt (if using unsalted butter)
- 1/2 cup mini chocolate chips (optional)
- 1/2 cup dried fruit (like raisins or chopped cranberries)
- Line an 8x8-inch baking pan with parchment paper, leaving some overhang for easy lifting.
- In a large bowl, combine the oats and crispy rice cereal. Set aside.
- In a small saucepan over medium heat, melt the butter, honey, and brown sugar, stirring until the sugar dissolves. Bring to a gentle boil and let it bubble for 1 minute without stirring.
- Remove from heat and stir in the peanut butter and vanilla until smooth.
- Pour the hot mixture over the dry ingredients. Add the chocolate chips and dried fruit, then stir until everything is well coated.
- Transfer the mixture to the prepared pan. Press it down firmly with a spatula or the bottom of a measuring cup—this is key for bars that hold together.
- Let cool at room temperature for 30 minutes, then refrigerate for at least 1 hour before cutting into 12 bars.
- Wrap each bar individually in parchment or plastic wrap for easy grab-and-go at the campsite.
Recipe: Easy Kids Granola Bars for Camping
Ingredients
- 2 cups old-fashioned rolled oats (not quick oats)
- 1 cup crispy rice cereal (like Rice Krispies)
- 1/2 cup unsalted butter (or coconut oil for dairy-free)
- 1/2 cup honey (or maple syrup)
- 1/3 cup brown sugar (packed)
- 1/2 cup peanut butter (or sunflower seed butter for nut-free)
- 1 teaspoon vanilla extract
- 1/4 teaspoon salt (if using unsalted butter)
- 1/2 cup mini chocolate chips (optional)
- 1/2 cup dried fruit (like raisins or chopped cranberries)
Instructions
- Line an 8x8-inch baking pan with parchment paper, leaving some overhang for easy lifting.
- In a large bowl, combine the oats and crispy rice cereal. Set aside.
- In a small saucepan over medium heat, melt the butter, honey, and brown sugar, stirring until the sugar dissolves. Bring to a gentle boil and let it bubble for 1 minute without stirring.
- Remove from heat and stir in the peanut butter and vanilla until smooth.
- Pour the hot mixture over the dry ingredients. Add the chocolate chips and dried fruit, then stir until everything is well coated.
- Transfer the mixture to the prepared pan. Press it down firmly with a spatula or the bottom of a measuring cup—this is key for bars that hold together.
- Let cool at room temperature for 30 minutes, then refrigerate for at least 1 hour before cutting into 12 bars.
- Wrap each bar individually in parchment or plastic wrap for easy grab-and-go at the campsite.