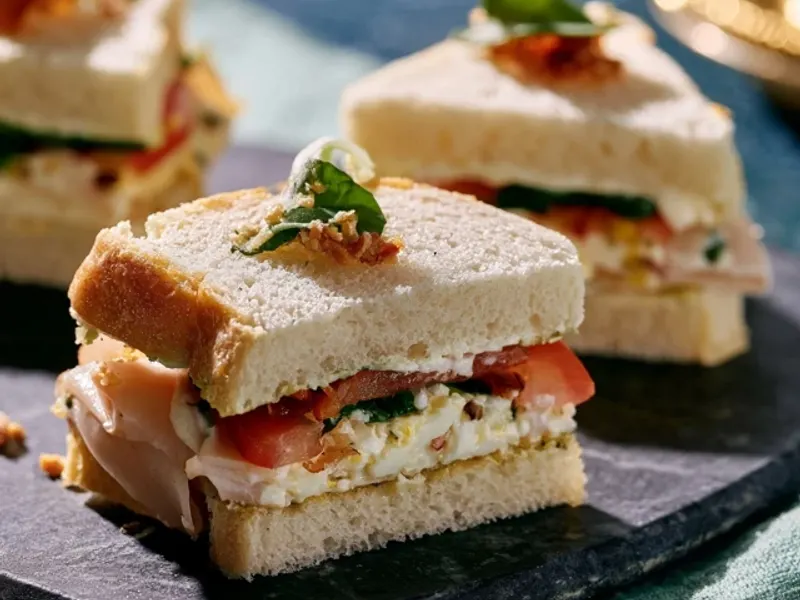
Easy Lunchbox Mini Sandwiches for Camping
The crunch of a fresh baguette, the cool bite of cheese, and a smear of mustard that doesn't turn the bread to mush—that's what I want at lunch when I'm camping. Not a sad, squished sandwich that fell apart in the backpack. That's why I started making mini sandwiches instead of full-size ones. They pack tighter, survive the hike to the lake, and honestly, they're more fun to eat. Here's how to build them so they actually hold up.

Why Mini Sandwiches Work for Camping
Mini sandwiches are the perfect camping lunch because they're portion-controlled, easy to eat with one hand, and they fit neatly into a lunchbox or a hard-sided container. When you're out on the trail or sitting on a log, you don't want to wrestle with a giant sub. Minis also let you offer variety—make a few turkey and cheese, a couple of hummus and veggie, and everyone picks what they want.
The key is to think like a sandwich architect. You're building for travel, not just taste. That means sturdy bread, a moisture barrier, and fillings that don't weep.
Pick the Right Bread
Soft sandwich bread is a disaster waiting to happen. It squishes, tears, and turns into a paste. Instead, reach for something with structure: sourdough, ciabatta, baguette, or even hearty rye. Small dinner rolls or slider buns are naturally mini and pack beautifully.
If you're using a baguette, slice it into 2-inch rounds. For rolls, slice them in half like a tiny burger. The goal is to have each mini sandwich be about two bites—easy to manage, easy to pack.
The Moisture Barrier Trick
Here's the trick that changes everything: spread a thin layer of butter, cream cheese, or hummus on both slices of bread before adding any wet fillings. This creates a barrier that keeps the bread from soaking up tomato juice or pickle brine. It's a simple step, but it's the difference between a crisp sandwich and a soggy one.
If you're using wet ingredients like sliced cucumbers or roasted peppers, pat them dry with a paper towel first. And if you're adding tomatoes, remove the seeds—they're mostly water.
Build and Secure
Layer your fillings in a logical order: protein, cheese, then any veggies. Press down gently to compact the sandwich—this helps it stay together when you cut it. Then use a sharp knife to slice each sandwich into quarters, or just halve them if you're using small rolls.
Push a toothpick through the center of each piece. This isn't just for looks—it holds the layers together during transport. When you're ready to eat, the toothpick doubles as a mini fork.
Packing for the Cooler or Lunchbox
Wrap each mini sandwich individually in parchment paper or beeswax wrap. Parchment is great because it's non-stick and compostable. Then place them in a hard-sided container—a plastic or metal lunchbox with a tight lid works best. This prevents crushing from the rest of your gear.
If you're bringing them in a cooler, put them in the coldest part, usually near the ice pack. And remember: keep your cooler in the shade, and open it as little as possible. A full cooler stays cold longer than a half-empty one, so pack it tight.
Filling Ideas That Travel Well
Not all fillings are created equal. Here are some combos that hold up for hours:
- Turkey and Swiss with a smear of mustard and a few spinach leaves.
- Ham and cheddar with a dab of honey mustard and a slice of apple.
- Hummus and roasted red pepper with cucumber slices—great for vegetarians.
- Chicken salad made with Greek yogurt instead of mayo, so it's less perishable.
- Caprese with fresh mozzarella, tomato, and basil—but only if you can eat it within a few hours.
Avoid anything too saucy or creamy, like egg salad with lots of mayo, unless you're eating them right away. And if you're camping with kids, stick to simple combos they already like—peanut butter and jelly on mini bagels is a classic that never fails.
Make-Ahead and Storage Tips
You can assemble mini sandwiches a day or two ahead of time. Keep them in the fridge until you're ready to hit the road. For a multi-day trip, consider freezing them—minus the lettuce and tomato, which don't freeze well. They'll thaw in the cooler by lunchtime.
When you're packing the cooler, put the sandwiches in a separate container to keep them from getting crushed by heavy items. And always use a separate cooler for drinks—that one gets opened constantly, and you don't want your lunch temperature fluctuating.
Safety Notes
Perishable fillings like meat and cheese need to stay below 40°F. If you're hiking far from the trailhead, consider using shelf-stable options like pepperoni, hard salami, or canned tuna pouches. And always wash your hands or use sanitizer before handling food at the campsite.
If you're using a camp stove to heat anything, keep it outside the tent and away from flammable gear. And store all food in bear-proof containers or hung properly if you're in bear country—this isn't just about smell, it's about safety.
Takeaway
Mini sandwiches are the unsung hero of camping lunches. They're easy to make, easy to pack, and they don't fall apart. With sturdy bread, a moisture barrier, and a toothpick to hold things together, you'll actually look forward to lunch on the trail. Try a few combinations before your next trip, and find your favorite.
Frequently Asked Questions
How do I keep mini sandwiches from getting soggy in a cooler?
Spread a thin layer of butter, cream cheese, or hummus on both slices of bread before adding wet fillings like tomatoes or pickles. This creates a moisture barrier. Also pack wet ingredients separately and assemble at lunch if you can, or use sturdy bread like ciabatta or sourdough.
What are the best breads for mini sandwiches that won't crush in a backpack?
Sturdy breads like baguette slices, ciabatta rolls, or thick sourdough hold up best. Avoid soft white bread or brioche, which squish easily. If using rolls, choose small ones like slider buns or dinner rolls—they're naturally mini and pack tightly.
Can I make mini sandwiches ahead of time for a multi-day camping trip?
Yes, but for best quality, only make 1-2 days ahead. Use hearty fillings like cured meats, hard cheeses, and roasted vegetables. Keep them cold in a cooler at 40°F or below. For longer trips, freeze sandwiches with no lettuce or tomato; they'll thaw in the cooler by lunch.
Easy Lunchbox Mini Sandwiches for Camping

Easy lunchbox mini sandwiches are no-cook, packable, and perfect for camping lunches. Use sturdy bread, a moisture barrier, and toothpicks to keep them neat and fresh.
- 8 slices sturdy bread (sourdough, ciabatta, or baguette) (or 4 small rolls)
- 4 tablespoons butter or cream cheese, softened (for moisture barrier)
- 4 ounces sliced turkey, ham, or salami (or your favorite protein)
- 4 slices cheddar, Swiss, or provolone cheese (thinly sliced)
- 1/2 cup spinach or arugula (optional)
- 1/4 cup sliced cucumbers or roasted red peppers (optional, pat dry)
- 8 toothpicks (for securing)
- Lay out your bread slices. If using a baguette, slice into 2-inch rounds.
- Spread a thin layer of butter or cream cheese on one side of each slice. This is your moisture barrier.
- Layer protein, cheese, and any optional veggies on half the slices. Keep wet ingredients like cucumbers patted dry.
- Top with the other bread slice, buttered side down.
- Press down gently to compact the sandwich.
- Cut each sandwich into quarters (or halves if using small rolls).
- Secure each piece with a toothpick pushed through the center.
- Wrap individually in parchment paper or beeswax wraps, then pack in a hard-sided container or cooler.
Recipe: Easy Lunchbox Mini Sandwiches for Camping
Ingredients
- 8 slices sturdy bread (sourdough, ciabatta, or baguette) (or 4 small rolls)
- 4 tablespoons butter or cream cheese, softened (for moisture barrier)
- 4 ounces sliced turkey, ham, or salami (or your favorite protein)
- 4 slices cheddar, Swiss, or provolone cheese (thinly sliced)
- 1/2 cup spinach or arugula (optional)
- 1/4 cup sliced cucumbers or roasted red peppers (optional, pat dry)
- 8 toothpicks (for securing)
Instructions
- Lay out your bread slices. If using a baguette, slice into 2-inch rounds.
- Spread a thin layer of butter or cream cheese on one side of each slice. This is your moisture barrier.
- Layer protein, cheese, and any optional veggies on half the slices. Keep wet ingredients like cucumbers patted dry.
- Top with the other bread slice, buttered side down.
- Press down gently to compact the sandwich.
- Cut each sandwich into quarters (or halves if using small rolls).
- Secure each piece with a toothpick pushed through the center.
- Wrap individually in parchment paper or beeswax wraps, then pack in a hard-sided container or cooler.