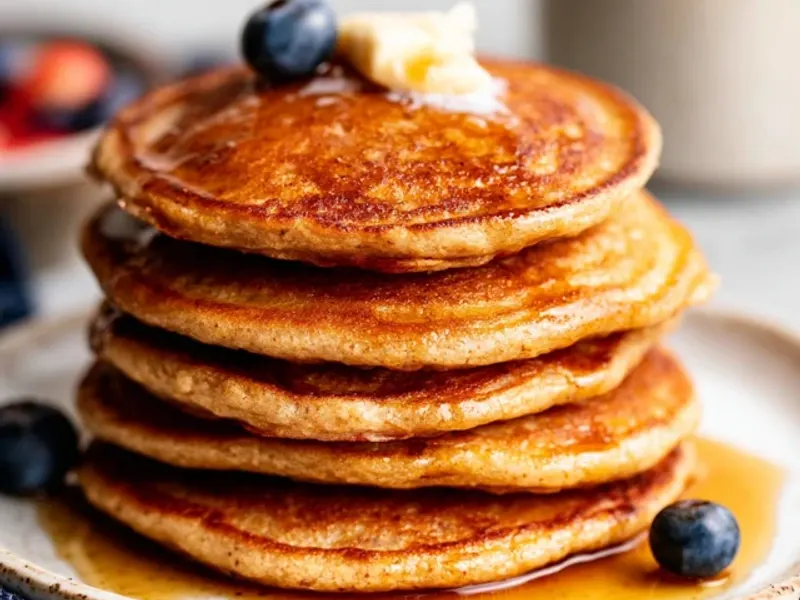
GFCF Camping Pancakes: Easy Gluten-Free Dairy-Free Mix
The morning air carries the scent of pine and woodsmoke, and your stomach growls. You’re at the campsite, coffee brewing, and the kids are asking for pancakes. But you’re gluten-free and dairy-free, so the instant mix from the store won’t work. That’s okay—you can have fluffy, golden GFCF pancakes right at the tent, and they’re easier than you think.

Why a Homemade Mix Works Better at Camp
Store-bought GFCF pancake mixes are convenient, but they’re often laden with gums and starches that turn rubbery when cooked over a campfire. A homemade mix lets you control the texture and flavor, and you can prepare it before you leave. Plus, you avoid the cardboard taste that plagues many gluten-free blends.
The trick is to combine a gluten-free flour blend with a bit of coconut flour and tapioca starch. The coconut flour adds structure and a subtle sweetness, while tapioca starch gives that tender chew you miss. Mix these dry ingredients at home in a mason jar, label it, and you’ve got a grab-and-go breakfast kit.
The Secret to Fluffy GFCF Pancakes
Here’s the non-commodity tip: let the batter rest for 5 minutes after mixing. Gluten-free flours need time to hydrate, and this rest allows the baking powder to activate properly. Skip this, and you’ll get dense, flat discs. Also, use a hot but not screaming-hot pan—medium-low heat on a camp stove is perfect. If the pan is too hot, the outside burns before the inside cooks.
Another pro move: add a splash of carbonated water (like club soda) to the batter if you have it. The bubbles create extra lift, making the pancakes even fluffier. It’s a small detail that makes a big difference.
Cooking on Cast Iron vs. Non-Stick
Cast iron is the classic camping choice—it distributes heat evenly and holds temperature well. If you’re using cast iron, make sure it’s well-seasoned before you leave. A light wipe of oil before cooking prevents sticking. Non-stick pans work, but you’ll need less oil, and they’re lighter to pack. Just avoid thin aluminum pans; they create hot spots that scorch the pancakes.
When cooking over a campfire, place the pan on a grate over the coals, not directly in the flames. The coals give steady heat, similar to a stove. If you’re on a camp stove, use a low flame and adjust as needed.
Pre-Making the Dry Mix: Storage and Transport
Combine all dry ingredients—gluten-free flour, coconut flour, tapioca starch, sugar, baking powder, baking soda, salt—in a quart-size mason jar. Use a permanent marker to write the date and “add wet” instructions on the lid. This saves space in your camp kitchen bin and avoids spills. Store the jar in a cool, dry place inside your tent, away from condensation.
If you’re backpacking, you can portion the mix into individual zip-top bags, one per meal. Just add the wet ingredients right in the bag and mix—less cleanup, and you can eat straight from the bag if you’re that kind of camper.
Adapting for Wind, Rain, and Cold Mornings
Wind is the enemy of a camp stove. Set up a windscreen using a foldable aluminum shield or a large rock to block gusts. In rain, cook under the vestibule of your tent, but never sleep with a stove inside—carbon monoxide is a real risk. Keep the stove at least two feet from the tent wall.
On cold mornings, the batter thickens as the coconut oil solidifies. Warm your almond milk slightly before mixing, or add an extra tablespoon of water to loosen it. If you’re cooking for a group, keep finished pancakes warm in a foil packet near the fire, but not on the coals, to avoid burning.
Kids and Picky Eaters: Fun Toppings and Add-Ins
Let kids customize their pancakes with safe toppings. Bring along small containers of maple syrup, honey, sunflower seed butter, or fruit compote. For a fun twist, add a handful of dairy-free chocolate chips or blueberries to the batter—just fold them in gently.
If you’re camping with kids who are new to GFCF, the familiar pancake shape helps them feel included. Let them pour their own batter into fun shapes—a bear or star—on the griddle. It turns breakfast into a game.
Cleanup and Wildlife-Safe Food Storage
After breakfast, scrape leftover batter and crumbs into a trash bag. Never leave food scraps around the campsite; they attract bears and other wildlife. Store all food, including the dry mix, in a bear canister or hung in a tree away from your tent, following local regulations.
Wash your cast iron with hot water and a stiff brush—no soap—and dry it over the fire to prevent rust. A thin coat of oil keeps it ready for the next meal.
The Takeaway
GFCF pancakes are a camp breakfast win. With a pre-made mix, a hot cast iron skillet, and a few simple techniques, you’ll enjoy a warm, satisfying meal that fits your dietary needs. The rest time, the right pan heat, and the water trick are the small details that make the difference. So next time you’re heading out, toss a jar of mix in your pack and wake up to the smell of pancakes in the pines.
Frequently Asked Questions
Can I make GFCF pancake mix ahead of time?
Yes, mix all dry ingredients (flours, starch, sugar, baking powder, salt) and store in a labeled mason jar or zip-top bag. At camp, just add water, oil, and eggs or flax eggs. It keeps for a week in a cool, dry spot.
What’s the best pan for GFCF pancakes at camp?
A well-seasoned cast iron skillet gives the best browning and holds heat evenly. If you’re lightening your pack, a non-stick pan works too, but you’ll need a bit more oil. Avoid thin aluminum pans—they scorch before the middle cooks.
How do I keep pancakes warm for a crowd at the campsite?
Set a plate over a pot of barely simmering water (not boiling) and cover with a clean towel. Or wrap pancakes in foil and tuck them near—but not on—the campfire coals. They stay soft for about 20 minutes.
GFCF Camping Pancakes: Easy Gluten-Free Dairy-Free Mix

Fluffy, tender pancakes made without gluten or dairy, using a simple mix you can prepare at home and cook on a cast iron skillet at camp.
- 1 cup gluten-free all-purpose flour blend (with xanthan gum)
- 2 tablespoons coconut flour (for structure)
- 2 tablespoons tapioca starch (for chew)
- 2 tablespoons coconut sugar (or brown sugar)
- 1 teaspoon baking powder (aluminum-free)
- 1/2 teaspoon baking soda
- 1/4 teaspoon salt
- 1 large egg (or flax egg for vegan)
- 1 cup unsweetened almond milk (or water)
- 2 tablespoons coconut oil (melted, plus more for pan)
- 1 teaspoon vanilla extract (optional)
- In a medium bowl, whisk together the gluten-free flour, coconut flour, tapioca starch, sugar, baking powder, baking soda, and salt.
- In a small bowl, beat the egg (or flax egg), then stir in the almond milk, melted coconut oil, and vanilla.
- Pour the wet ingredients into the dry and stir until just combined. Let the batter rest for 5 minutes—this lets the flours hydrate and thickens the batter.
- Heat a cast iron skillet over medium-low heat. Add a small pat of coconut oil and swirl to coat.
- Pour 1/4 cup of batter per pancake. Cook until bubbles form on the surface and the edges look set, about 2-3 minutes.
- Flip and cook another 1-2 minutes until golden and cooked through. Repeat with remaining batter, adding oil as needed.
- Serve warm with maple syrup, fresh berries, or a drizzle of nut butter. Store leftovers in foil and reheat on a low skillet.
Recipe: GFCF Camping Pancakes: Easy Gluten-Free Dairy-Free Mix
Ingredients
- 1 cup gluten-free all-purpose flour blend (with xanthan gum)
- 2 tablespoons coconut flour (for structure)
- 2 tablespoons tapioca starch (for chew)
- 2 tablespoons coconut sugar (or brown sugar)
- 1 teaspoon baking powder (aluminum-free)
- 1/2 teaspoon baking soda
- 1/4 teaspoon salt
- 1 large egg (or flax egg for vegan)
- 1 cup unsweetened almond milk (or water)
- 2 tablespoons coconut oil (melted, plus more for pan)
- 1 teaspoon vanilla extract (optional)
Instructions
- In a medium bowl, whisk together the gluten-free flour, coconut flour, tapioca starch, sugar, baking powder, baking soda, and salt.
- In a small bowl, beat the egg (or flax egg), then stir in the almond milk, melted coconut oil, and vanilla.
- Pour the wet ingredients into the dry and stir until just combined. Let the batter rest for 5 minutes—this lets the flours hydrate and thickens the batter.
- Heat a cast iron skillet over medium-low heat. Add a small pat of coconut oil and swirl to coat.
- Pour 1/4 cup of batter per pancake. Cook until bubbles form on the surface and the edges look set, about 2-3 minutes.
- Flip and cook another 1-2 minutes until golden and cooked through. Repeat with remaining batter, adding oil as needed.
- Serve warm with maple syrup, fresh berries, or a drizzle of nut butter. Store leftovers in foil and reheat on a low skillet.