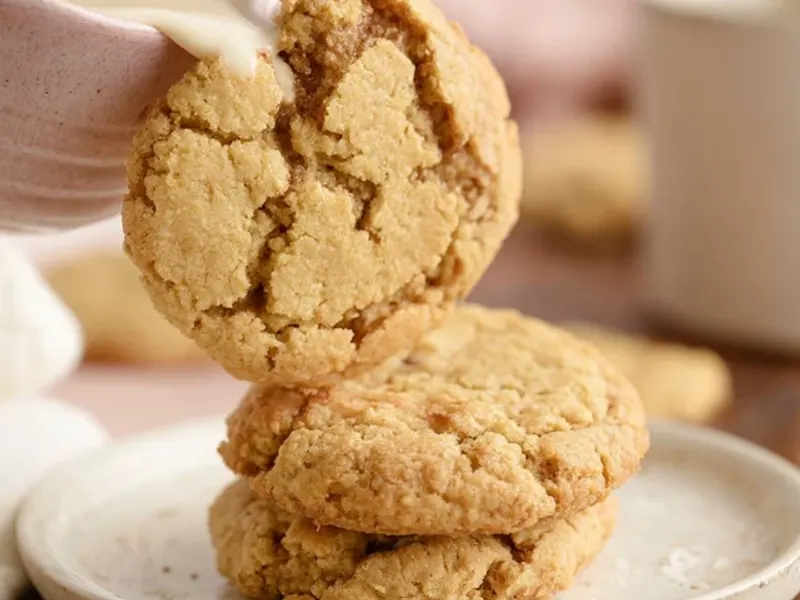
GFCF Cookies for Camping: Soft, Safe & Packable Treats
The first time I carried store-bought gluten-free cookies on a backpacking trip, they crumbled into a sad pile of dust by the second mile. That's when I started experimenting with my own GFCF cookies — ones that could survive a bumpy trail and still taste like a real treat. After many batches, I've found a method that works: the right flour blend, a firm fat, and a slightly underbaked center. Here's how to make them, plus how to pack them so they actually arrive intact.

Why GFCF Cookies for Camping?
Camping already has enough challenges — wind, rain, uneven ground. You don't need a cookie that falls apart the moment you unzip your pack. Gluten-free and dairy-free cookies are often dry or crumbly because they lack the structure of gluten and the moisture of butter. But with a few tweaks, you can make cookies that are soft, chewy, and sturdy enough for the trail.
The Right Flour Blend: Don't Just Use One
The biggest mistake is using only a gluten-free all-purpose flour. It works, but it can be gritty or dry. I use a 3:1 ratio of gluten-free all-purpose flour to almond flour. The almond flour adds moisture and fat, which helps the cookies stay tender. If you're nut-free, use oat flour instead — just make sure it's certified gluten-free if you're sensitive.
Also, check your all-purpose blend for xanthan gum. If it doesn't have it, add ½ teaspoon to the dry mix. Xanthan gum gives the cookies that stretchy, chewy texture that gluten would normally provide.
Fat Matters: Coconut Oil Is Your Friend
Butter is out, but coconut oil is in. Use it solid, not melted. Melted oil makes the cookies spread too thin and turn crispy. Solid coconut oil creams with the sugar just like butter, giving you a light, airy dough. Plus, coconut oil stays firm at cooler temperatures, which is perfect for camping — your cookies won't turn greasy in your pack.
If you don't like coconut flavor, use a neutral vegan butter or margarine. Just avoid anything with a high water content, as that can make the cookies tough.
The Underbake Trick
Here's the secret: pull the cookies out when the edges are golden but the centers still look slightly wet. They'll continue to set as they cool. This leaves the centers soft and chewy, which is exactly what you want for a trail treat. Overbaking is the #1 way to end up with crumbly rocks.
I also press a few chocolate chips into the tops of the dough balls before baking. It looks nicer and ensures every bite has a chip.
Packing Tips for the Trail
Once your cookies are baked and completely cool, pack them in a rigid plastic container or a lightweight tin. Line the bottom with parchment paper, then place a single layer of cookies. Add another sheet of parchment, then another layer. Never stack more than two layers deep — weight crushes the bottom ones.
If you're car camping, store the container in a cooler with ice packs. The cool temperature actually helps the cookies hold their shape. For backpacking, keep them in your bear canister or odor-proof bag, away from your tent. Remember, food smells attract wildlife, so store all food properly.
Making Them at Camp: A No-Oven Option
If you don't want to bake ahead, you can make these cookies at the campsite using a camp stove and a heavy-bottomed skillet. Mix the dough at home and keep it chilled in your cooler. At camp, scoop small balls of dough into a greased skillet over low heat. Cover with a lid or foil to trap the heat, and cook for about 8-10 minutes, flipping once. They won't be as pretty, but they'll be warm and gooey — perfect with a cup of camp coffee.
Adapting for Weather and Kids
On a hot day, the dough can get sticky. If that happens, pop it back in the cooler for 15 minutes before shaping. For kids, make smaller cookies — they're easier for little hands to hold and less likely to break. You can also press them into a bar shape and cut them into squares for a mess-free snack.
If you're camping in humid conditions, add an extra tablespoon of flour to the dough. Humidity makes gluten-free flours absorb more moisture, which can make the cookies gummy.
Storage and Freshness
These cookies keep for up to a week in an airtight container at room temperature, but they're best within the first three days. If you're going on a longer trip, freeze them at home and let them thaw in your cooler. They'll be just as good on day five as they were on day one.
Final Takeaway
GFCF cookies don't have to be a compromise. With the right flour blend, solid coconut oil, and a careful underbake, you get a cookie that's soft, flavorful, and tough enough for the trail. Make a batch before your next trip, and you'll never settle for sad, crumbly store-bought ones again.
Frequently Asked Questions
How do I keep GFCF cookies from crumbling in my backpack?
Pack them in a rigid container with parchment paper between layers. Use a cookie recipe that's slightly underbaked and add a bit of extra fat (like coconut oil) to keep them pliable. Avoid stacking more than two layers deep.
Can I use a campfire to bake GFCF cookies?
Yes, but it's tricky. Use a Dutch oven with a trivet and bake over low coals, not open flames. Rotate the lid every 5 minutes to avoid hot spots. Alternatively, make no-bake cookies using a camp stove and a pot.
What's the best substitute for butter in GFCF cookies?
Coconut oil works well – it firms up at cooler temperatures, which helps cookies hold their shape on the trail. Vegan butter or margarine also works. For a nutty flavor, try sunflower seed butter, but reduce the liquid slightly.
GFCF Cookies for Camping: Soft, Safe & Packable Treats

Soft-baked GFCF cookies that hold together on the trail, made with a blend of gluten-free flours and coconut oil. Easy to mix at camp or bake at home.
- 1 ½ cups gluten-free all-purpose flour (with xanthan gum)
- ½ cup almond flour (or oat flour for nut-free)
- ½ tsp baking soda
- ¼ tsp salt
- ½ cup coconut oil (solid, not melted)
- ¾ cup brown sugar (packed)
- 1 large egg (or flax egg for vegan)
- 1 tsp vanilla extract
- ½ cup dairy-free chocolate chips (optional)
- Preheat your oven to 350°F (175°C). Line a baking sheet with parchment paper.
- In a medium bowl, whisk together the gluten-free flour, almond flour, baking soda, and salt. Set aside.
- In a large bowl, cream the solid coconut oil and brown sugar until light and fluffy, about 2 minutes.
- Beat in the egg (or flax egg) and vanilla extract until well combined.
- Gradually add the dry ingredients to the wet mixture, mixing until just combined. Fold in chocolate chips if using.
- Scoop rounded tablespoons of dough onto the prepared baking sheet, spacing them 2 inches apart.
- Bake for 10-12 minutes, until the edges are golden but the centers look slightly soft.
- Let cool on the baking sheet for 5 minutes, then transfer to a wire rack to cool completely. Store in an airtight container.
Recipe: GFCF Cookies for Camping: Soft, Safe & Packable Treats
Ingredients
- 1 ½ cups gluten-free all-purpose flour (with xanthan gum)
- ½ cup almond flour (or oat flour for nut-free)
- ½ tsp baking soda
- ¼ tsp salt
- ½ cup coconut oil (solid, not melted)
- ¾ cup brown sugar (packed)
- 1 large egg (or flax egg for vegan)
- 1 tsp vanilla extract
- ½ cup dairy-free chocolate chips (optional)
Instructions
- Preheat your oven to 350°F (175°C). Line a baking sheet with parchment paper.
- In a medium bowl, whisk together the gluten-free flour, almond flour, baking soda, and salt. Set aside.
- In a large bowl, cream the solid coconut oil and brown sugar until light and fluffy, about 2 minutes.
- Beat in the egg (or flax egg) and vanilla extract until well combined.
- Gradually add the dry ingredients to the wet mixture, mixing until just combined. Fold in chocolate chips if using.
- Scoop rounded tablespoons of dough onto the prepared baking sheet, spacing them 2 inches apart.
- Bake for 10-12 minutes, until the edges are golden but the centers look slightly soft.
- Let cool on the baking sheet for 5 minutes, then transfer to a wire rack to cool completely. Store in an airtight container.