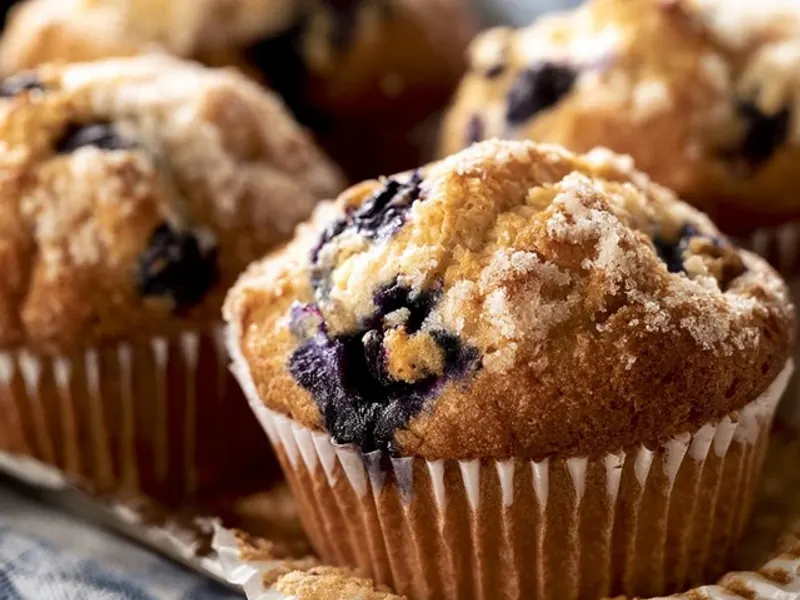
Gluten and Dairy Free Muffins for Camping
The first morning at camp, the air is cool and the coffee is percolating. What you want is something warm, filling, and easy to grab while you sit on a log and watch the sun hit the trees. These gluten and dairy free muffins are exactly that – a soft, lightly sweet bite that holds up to the trail and the tent.

I've learned that baking ahead is the secret to a relaxed camp breakfast. When you're juggling tent poles and a camp stove, the last thing you need is a complicated recipe. These muffins come together in one bowl, bake in under half an hour, and pack like a dream. Plus, they're made with simple ingredients that don't require a special trip to a fancy health food store.
Why These Muffins Work at a Campsite
Most gluten free baked goods turn into crumbly messes by day two. Not these. The oat flour gives them a sturdy crumb that holds together when you're hiking or tossing them in a backpack. The coconut oil keeps them moist without needing dairy butter, and the almond milk adds just enough richness.
But the real trick? Bake them at home, let them cool completely, then wrap each one individually in parchment paper. This locks in moisture and prevents them from sticking together. When you're ready to eat, you can warm them over a campfire on a stick or just eat them at room temperature – they're delicious either way.
Make-Ahead and Packing Tips
I always bake a double batch before a trip. One batch goes into the cooler for the first two mornings, and the other goes in the freezer. If you're camping for more than a few days, frozen muffins double as ice packs in your cooler – they thaw by the time you need them.
For packing, use a hard-sided container, not a flimsy zip-top bag. A plastic Tupperware or a metal tin works best. Place a sheet of paper towel at the bottom to absorb any extra moisture, and layer the wrapped muffins so they don't crush each other. If you're traveling in hot weather, keep the container in the cooler, not in the car – heat will make them sweat and turn soggy.
Adapting for Camp Baking
If you're feeling ambitious and want to bake these at your campsite, you can. A Dutch oven with a trivet works perfectly. Set it over medium-low coals, place the muffin tin inside, and cover with the lid. Use about 10 coals on top and 6 on the bottom to maintain a steady 350°F. Rotate the pot a quarter turn every 5 minutes to avoid hot spots. It takes a bit of practice, but the smell of fresh muffins in the woods is worth it.
One mistake I see campers make is using a regular muffin tin without liners in a Dutch oven. The batter will stick to the pan, and you'll be scrubbing for an hour. Always use paper liners or grease the tin generously with coconut oil.
Mix-Ins and Variations
The base recipe is a blank canvas. In the summer, fold in fresh blueberries or diced strawberries – just pat them dry first so they don't make the batter too wet. In the fall, add chopped apple and a pinch of nutmeg. You can also swap the blueberries for chocolate chips (check that they're dairy free) for a sweeter treat.
If you're cooking for kids, make mini muffins. They bake faster – about 12 minutes – and are easier for little hands. Just adjust the baking time and keep an eye on them.
Keeping It Safe and Simple
When you're at camp, food safety matters. Keep your muffins in the cooler if the temperature is above 70°F, especially if they have fruit in them. And always store them in a bear-proof container or hung from a tree if you're in bear country – the scent of baked goods can attract wildlife. Check local regulations for food storage rules.
One more thing: don't forget to bring a small jar of your favorite nut butter or jam to spread on top. It turns a simple muffin into a satisfying breakfast that will keep you hiking until lunch.
The Takeaway
Gluten and dairy free muffins don't have to be dry or tasteless. With oat flour and a few pantry staples, you can have a tender, portable breakfast that makes camp mornings feel a little more special. Bake them ahead, pack them smart, and enjoy every crumb – even the ones that fall on the pine needles.
Frequently Asked Questions
Can I make these gluten and dairy free muffins ahead of time?
Yes, bake them up to 3 days ahead and store in an airtight container. For longer trips, freeze them and let them thaw in the cooler or at camp.
What’s the best way to pack muffins for camping?
Wrap each muffin in parchment or beeswax wrap, then place in a hard-sided container to prevent crushing. Keep them in a cooler if the weather is warm.
Can I bake these muffins at the campsite?
Absolutely. Use a Dutch oven with a trivet or a camp stove with a foldable oven. Just keep the heat low and rotate the pan halfway through.
Gluten and Dairy Free Muffins for Camping

A tender, lightly sweet muffin made with oat flour and almond milk, perfect for make-ahead camp breakfasts. No gluten, no dairy, but full of flavor.
- 2 cups gluten-free oat flour (or blend of your choice)
- 1 teaspoon baking powder
- 1/2 teaspoon baking soda
- 1/2 teaspoon salt
- 1 teaspoon cinnamon (optional)
- 1/3 cup maple syrup (or honey if not strict)
- 1/3 cup coconut oil (melted, or neutral oil)
- 2 large eggs (room temperature)
- 1 cup unsweetened almond milk (or other dairy-free milk)
- 1 teaspoon vanilla extract
- 1/2 cup fresh blueberries (or chopped apple, optional)
- Preheat your oven to 350°F (175°C). Line a 12-cup muffin tin with paper liners or grease with oil.
- In a large bowl, whisk together the oat flour, baking powder, baking soda, salt, and cinnamon.
- In a separate bowl, beat the eggs, then add maple syrup, melted coconut oil, almond milk, and vanilla. Mix well.
- Pour the wet ingredients into the dry and stir until just combined. Fold in blueberries if using. Don't overmix – lumps are fine.
- Divide the batter evenly among the muffin cups, filling each about 3/4 full.
- Bake for 18–22 minutes, until a toothpick inserted in the center comes out clean. Let cool in the pan for 5 minutes, then transfer to a wire rack.
Recipe: Gluten and Dairy Free Muffins for Camping
Ingredients
- 2 cups gluten-free oat flour (or blend of your choice)
- 1 teaspoon baking powder
- 1/2 teaspoon baking soda
- 1/2 teaspoon salt
- 1 teaspoon cinnamon (optional)
- 1/3 cup maple syrup (or honey if not strict)
- 1/3 cup coconut oil (melted, or neutral oil)
- 2 large eggs (room temperature)
- 1 cup unsweetened almond milk (or other dairy-free milk)
- 1 teaspoon vanilla extract
- 1/2 cup fresh blueberries (or chopped apple, optional)
Instructions
- Preheat your oven to 350°F (175°C). Line a 12-cup muffin tin with paper liners or grease with oil.
- In a large bowl, whisk together the oat flour, baking powder, baking soda, salt, and cinnamon.
- In a separate bowl, beat the eggs, then add maple syrup, melted coconut oil, almond milk, and vanilla. Mix well.
- Pour the wet ingredients into the dry and stir until just combined. Fold in blueberries if using. Don't overmix – lumps are fine.
- Divide the batter evenly among the muffin cups, filling each about 3/4 full.
- Bake for 18–22 minutes, until a toothpick inserted in the center comes out clean. Let cool in the pan for 5 minutes, then transfer to a wire rack.