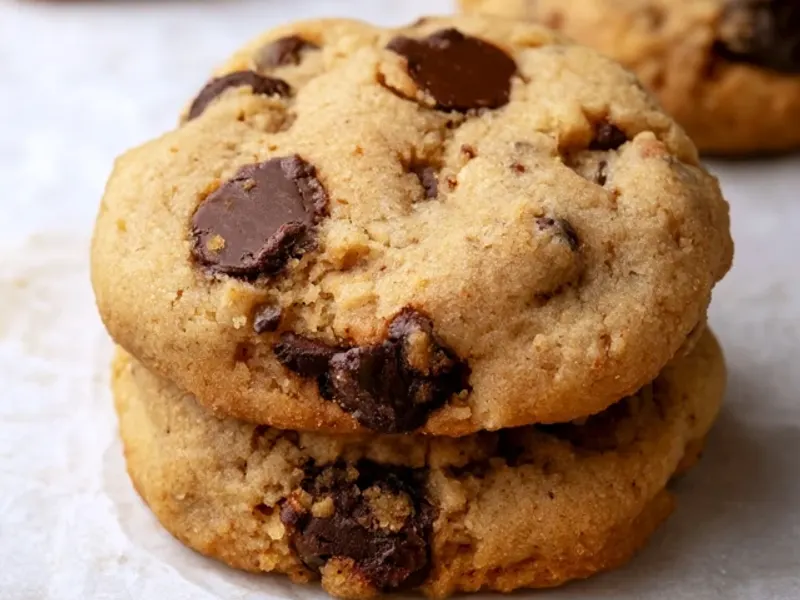
Gluten-Free Dairy-Free Camping Cookies That Survive the Trail
The first time I pulled a crumbly, gluten-free cookie out of my pack at a campsite, I spent the next ten minutes picking tiny bits of oat out of my sleeping bag. That was the day I realized that camp cookies need to be built like a good tent peg—sturdy, reliable, and not prone to falling apart when the wind picks up. After many batches, I've landed on a recipe that holds its shape, tastes like a treat, and doesn't require a single dairy product or a gluten-containing grain. It's the cookie I bring on every trip now, and it's the one I'm sharing with you.

Why Most Gluten-Free Cookies Fail at Camp
Gluten-free baking is a different beast. Without gluten, you lose the elastic network that holds cookies together, which is why so many recipes crumble the moment you look at them. Add a bumpy trail and a warm backpack, and you've got a bag of sand. The trick is to build structure from other ingredients. Oats give you a hearty chew, nut or seed butter adds fat that binds, and a bit of resting time lets the flours hydrate so the dough comes together like a proper dough, not a pile of dust.
Another common mistake is overbaking. Gluten-free cookies often look underdone in the center even when they're ready. If you wait until they look fully set, they'll be dry and brittle by the time you reach the trailhead. Pull them out when the edges are golden and the middle still has a slight shine—they'll finish setting as they cool, and you'll get a chewy texture that survives a hike.
The Right Fat: Coconut Oil Over Butter
Butter is a classic cookie fat, but it's out for a dairy-free recipe. Coconut oil is my go-to because it's solid at room temperature (unless you're camping in a heatwave), which means your cookies won't turn into a puddle in your pack. It also has a higher smoke point, so it's more forgiving if your camp oven runs a little hot. If you're in a warm climate, store the baked cookies in a hard-sided container—I use a metal tin that used to hold tea—and keep them in the shade. A small ice pack tucked under the tin works wonders on a 90°F day.
Why Sunflower Seed Butter?
I use sunflower seed butter in this recipe because it's nut-free, which makes it safer for group campsites where someone might have a nut allergy. It also has a neutral flavor that lets the oats and coconut shine. If you're not worried about nuts, cashew or almond butter works just as well. Just make sure your seed or nut butter is well-stirred—the oil that separates on top can throw off the fat ratio and make your cookies greasy.
Making the Dough at Home vs. At Camp
You have two options: make the dough ahead and bake at camp, or bake at home and just pack the finished cookies. I've done both. If you have a Dutch oven or a camp stove with a skillet and lid, making them fresh at camp is a joy—the smell of baking cookies mixing with pine smoke is something else. But if you're backpacking or want to keep things simple, bake at home. These cookies actually taste better on day two or three, as the flavors meld and the texture sets. They're one of the few baked goods that improve with a night in a Ziploc bag.
If you're baking at camp, use a Dutch oven with a trivet to keep the cookies from burning on the bottom. Place the Dutch oven over a few coals, then put more coals on the lid—about twice as many on top as underneath. Check after 8 minutes, then rotate the lid a quarter turn to ensure even heat. If you're using a camp stove, a cast-iron skillet with a lid works fine. Keep the heat low—around 325°F (160°C)—and watch closely. A camp oven is a fickle beast, and you'll want to rotate the pan halfway through.
Packing and Storing: Keep Them Crumb-Free
Once your cookies are completely cool (this is non-negotiable—warm cookies will steam and soften), pack them in a hard-sided container. A metal tin or a sturdy plastic tub works better than a bag, because bags let the cookies get crushed under your gear. Layer them with parchment paper between each cookie—this prevents them from sticking together and adds a little cushion. If you're worried about moisture, toss a dry paper towel in the bottom of the tin; it'll absorb any humidity and keep the cookies crisp.
One more tip: if you're hiking with kids, let them each pack their own cookie in a small reusable pouch. It gives them a sense of ownership, and it means you're not the one digging through a shared tin for a snack that's turned to crumbs. I've learned that lesson the hard way.
Adapting for Weather and Altitude
Camping is unpredictable, and so is baking. If you're at altitude (above 5,000 feet), you may need to add a tablespoon of extra liquid to the dough, as the lower air pressure can dry things out. If it's humid, your dough might be stickier—that's okay, just chill it for 15 minutes before scooping. And if a storm rolls in and you can't bake, don't panic. The dough itself is delicious raw (though I'd skip it if you're using raw flour—heat it first if you're concerned about food safety). You can also roll the dough into balls and freeze them at home, then thaw and eat them as no-bake bites. They're not cookies, but they're close enough when the rain won't quit.
Serving Them at Camp
These cookies are great on their own, but they also shine as a dessert base. Crumble one over a bowl of coconut milk ice cream (if you have a cooler) or sandwich two with a dollop of dairy-free chocolate spread. For a campfire treat, wrap a cookie in foil with a few dark chocolate chips and warm it over the coals for a minute—just long enough to melt the chips without turning the cookie to mush. It's a simple pleasure that feels like a luxury after a day on the trail.
Safety Notes for Camp Baking
Whenever you're baking at camp, remember the basics: set up your stove or Dutch oven on a flat, level surface away from tent walls and flammable gear. Never use a camp stove inside a tent—carbon monoxide is a real and invisible danger. If you're using a campfire, keep a bucket of water nearby and make sure the fire is fully extinguished before you go to sleep. And always store food in bear-proof containers or hang it properly if you're in bear country. A cookie is a great treat, but it's not worth a midnight visitor.
The Takeaway
Gluten-free dairy-free cookies don't have to be a disappointment. With the right fat, a binder like oats, and a little patience, you can have a sturdy, tasty treat that travels well and tastes like home. Make a batch before your next trip, pack them in a tin, and you'll never go back to crumbling store-bought bars. Happy trails—and happy snacking.
Frequently Asked Questions
Why do my gluten-free cookies crumble so easily at camp?
Gluten-free flours lack the binding proteins that hold cookies together. The fix is to add a binder like xanthan gum (if your flour blend doesn't have it) and to let the dough rest for 30 minutes before baking. That rest allows the flours to hydrate, which creates a sturdier structure. Also, underbake slightly—cookies continue to set as they cool, and a slightly softer center is less likely to crack.
Can I make these gluten-free dairy-free cookies without a camp oven?
Yes. You can bake them in a Dutch oven with a trivet and a few hot coals on top, or you can make the dough at home and bake them in a skillet over a camp stove with a lid. The key is low, even heat—aim for about 325°F (160°C) and check often. If you're at a site with no cooking equipment, make the dough at home, roll it into balls, and freeze them. Then just thaw and eat—they're still delicious.
How do I keep cookies from melting in my backpack on a hot day?
Choose a recipe with a high ratio of oats to fat, and avoid chocolate chips that soften. These oat-based cookies use coconut oil, which has a higher melting point than butter, but if it's above 80°F (27°C), store them in a hard-sided container with a small ice pack. Wrap each cookie in parchment paper—that adds a layer of insulation and prevents them from sticking together.
Gluten-Free Dairy-Free Camping Cookies That Survive the Trail

A sturdy, chewy oat-based cookie that holds its shape in a backpack and tastes great at camp. No gluten, no dairy, no fuss—just a simple treat that survives the trail.
- 1.5 cups gluten-free rolled oats (certified gluten-free if you're sensitive)
- 1 cup almond flour (or other finely ground nut flour)
- 0.5 cup coconut sugar (or brown sugar)
- 0.5 tsp baking soda
- 0.25 tsp salt (skip if your nut butter is salted)
- 0.5 cup creamy sunflower seed butter (or any nut/seed butter, well-stirred)
- 0.25 cup coconut oil (melted but not hot)
- 0.25 cup maple syrup (pure, not pancake syrup)
- 1 tsp vanilla extract
- 0.5 cup dried cranberries (or chopped dried cherries, optional)
- Preheat your oven to 350°F (175°C). Line a baking sheet with parchment paper.
- In a large bowl, whisk together the oats, almond flour, coconut sugar, baking soda, and salt.
- In a separate bowl, mix the sunflower seed butter, melted coconut oil, maple syrup, and vanilla until smooth. If the mixture looks separated, that's okay—keep stirring.
- Pour the wet ingredients into the dry and stir with a spatula until no dry streaks remain. Fold in the dried cranberries if using.
- Let the dough rest for 10 minutes. This lets the oats absorb some moisture, which makes the cookies less crumbly.
- Scoop rounded tablespoons of dough onto the prepared sheet, spacing them about 2 inches apart. Flatten each slightly with your palm—these cookies don't spread much.
- Bake for 10-12 minutes, until the edges are golden but the centers still look slightly underdone. They will firm up as they cool.
- Cool on the pan for 5 minutes, then transfer to a wire rack. Once completely cool, store in an airtight container or pack in a hard-sided tin for the trail.
Recipe: Gluten-Free Dairy-Free Camping Cookies That Survive the Trail
Ingredients
- 1.5 cups gluten-free rolled oats (certified gluten-free if you're sensitive)
- 1 cup almond flour (or other finely ground nut flour)
- 0.5 cup coconut sugar (or brown sugar)
- 0.5 tsp baking soda
- 0.25 tsp salt (skip if your nut butter is salted)
- 0.5 cup creamy sunflower seed butter (or any nut/seed butter, well-stirred)
- 0.25 cup coconut oil (melted but not hot)
- 0.25 cup maple syrup (pure, not pancake syrup)
- 1 tsp vanilla extract
- 0.5 cup dried cranberries (or chopped dried cherries, optional)
Instructions
- Preheat your oven to 350°F (175°C). Line a baking sheet with parchment paper.
- In a large bowl, whisk together the oats, almond flour, coconut sugar, baking soda, and salt.
- In a separate bowl, mix the sunflower seed butter, melted coconut oil, maple syrup, and vanilla until smooth. If the mixture looks separated, that's okay—keep stirring.
- Pour the wet ingredients into the dry and stir with a spatula until no dry streaks remain. Fold in the dried cranberries if using.
- Let the dough rest for 10 minutes. This lets the oats absorb some moisture, which makes the cookies less crumbly.
- Scoop rounded tablespoons of dough onto the prepared sheet, spacing them about 2 inches apart. Flatten each slightly with your palm—these cookies don't spread much.
- Bake for 10-12 minutes, until the edges are golden but the centers still look slightly underdone. They will firm up as they cool.
- Cool on the pan for 5 minutes, then transfer to a wire rack. Once completely cool, store in an airtight container or pack in a hard-sided tin for the trail.