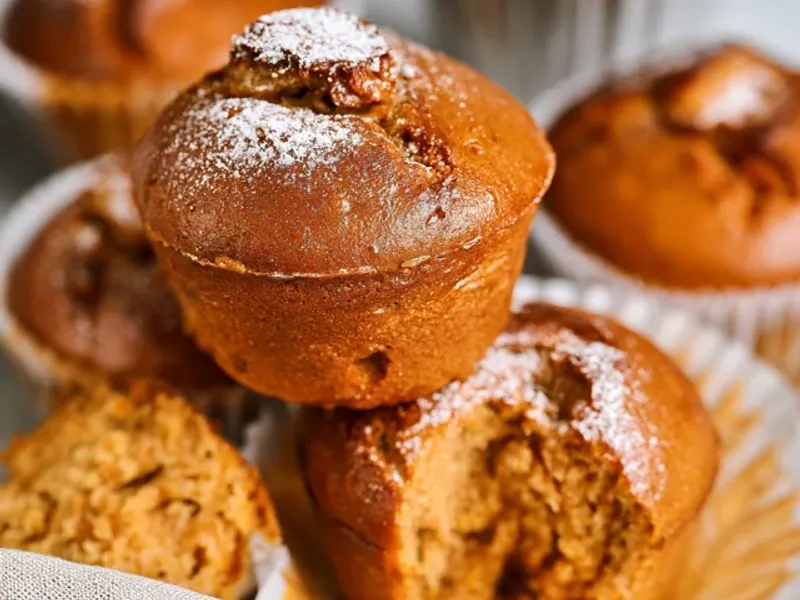
Gluten-Free Dairy-Free Muffins: Camping Breakfast Tips
The morning air is crisp, and the coffee is percolating on the stove. You reach for a muffin, but your stomach says no to gluten, and your body says no to dairy. It's a familiar camping conundrum. The good news? You can have your muffin and eat it too, even at a campsite. With a little planning and the right recipe, gluten-free dairy-free muffins become a trail-worthy breakfast that doesn't crumble into disappointment.

Why Regular Muffins Fail at Camp
Most store-bought muffins are gluten and dairy bombs. Even the "healthy" ones often hide milk powder or wheat flour. And if you've tried baking gluten-free at home, you know the texture can be delicate. At camp, with altitude changes and cooler temps, they can turn into hockey pucks or dust. The secret is moisture and fat – but we're skipping the butter and eggs. That's where applesauce and coconut oil come in. They add moisture and structure without dairy, and they travel well.
Baking at Home vs. At Camp
I bake these muffins at home, 100% of the time. It's not that you can't bake in a Dutch oven – you can, and it's a fun challenge. But for a hassle-free morning, bake at home and pack them. This also means you control the ingredients and avoid cross-contamination, which is critical for celiacs or severe allergies. If you do bake at camp, use a cast iron Dutch oven with a lid. Place it on a grate over low coals, and put a few coals on top for even heat. Rotate the oven every 10 minutes, and check with a toothpick. It's doable, but it takes practice.
Packing and Storage Hacks
Here's the trick that changes everything: wrap each muffin individually in parchment paper, then place them in a hard-sided container like a plastic Tupperware or a metal tin. The parchment absorbs moisture and prevents them from getting soggy. Avoid plastic bags – they trap humidity and turn your muffins into a sticky mess. If you're hiking, put the container in the middle of your pack, not at the bottom where they'll get crushed. For a weekend trip, they'll stay fresh for 2-3 days at room temperature. For longer trips, freeze them before you leave and they'll thaw by morning.
The Recipe: Simple and Reliable
This recipe is my go-to. It uses pantry staples, which means you don't need a specialty store. The applesauce replaces eggs, and the coconut oil stands in for butter. The result is a moist, tender crumb that holds together – no crumbling in your hand while you watch the sunrise.
Key tips:
- Use a gluten-free flour blend that already contains xanthan gum. If yours doesn't, add 1/2 teaspoon of xanthan gum to the dry mix. This gives the muffins structure, so they don't fall apart.
- Don't overmix the batter. Stir until just combined – a few lumps are fine. Overmixing develops gluten (even in gluten-free blends) and makes them tough.
- Let the muffins cool completely before packing. Warm muffins create condensation, which leads to sogginess.
Adaptations for Camp Conditions
If you're camping at high altitude (above 3,500 feet), you may need to adjust. At altitude, baked goods rise faster and can collapse. Add an extra tablespoon of flour and reduce the baking powder by 1/4 teaspoon. Also, increase the oven temperature by 15°F and decrease the baking time by a few minutes. Check early.
In humid climates, the muffins may absorb moisture from the air. Keep them in a sealed container, and if they do get soft, pop them over a campfire on a stick for a quick toast. It's a delicious rescue.
Kid-Friendly and Allergy-Safe
These muffins are a hit with kids because they're sweet but not overly so. The chocolate chips are optional, but they're a great bribe for a hike. If you're camping with kids, let them help measure and stir at home – it gets them invested in the meal. And if you have other allergies, this recipe is easily adaptable. Swap the coconut oil for any neutral oil, and use any dairy-free milk you like. For nut-free, skip the almond milk and use oat milk. Always check labels for hidden gluten or dairy – some chocolate chips are processed in facilities with wheat.
Safety Note on Camp Stoves and Ovens
If you're baking at camp, use a camp stove or Dutch oven outside, never inside a tent. Carbon monoxide is a silent danger – it's odorless and can be fatal. Also, if you're using a campfire, make sure it's fully extinguished before you leave or sleep. Stir the ashes and pour water over them. And when you store your muffins, keep them in a bear-proof container or hang them from a tree if you're in bear country – food smells attract wildlife.
Takeaway
Gluten-free dairy-free muffins are more than a recipe – they're a camping essential for anyone with dietary restrictions. Bake them at home, pack them right, and you'll have a satisfying breakfast that lets you focus on the trail ahead. No compromises, just good food in the great outdoors.
Frequently Asked Questions
Can I make gluten-free dairy-free muffins ahead of time for camping?
Yes, bake them 1-2 days before your trip. Cool completely, then store in an airtight container. They stay fresh at room temperature for 2-3 days, or freeze them for longer trips.
How do I keep muffins from getting soggy in my backpack?
Wrap each muffin in parchment paper or paper towel before placing in a hard-sided container. The paper absorbs moisture and prevents crushing. Avoid plastic bags, which trap humidity.
Can I use a muffin tin over a campfire?
Yes, but it's tricky. Use a cast iron muffin pan and place it on a grate over low coals, not open flames. Rotate the pan frequently and check with a toothpick. Alternatively, use a Dutch oven with a lid and coals on top for even heat.
Gluten-Free Dairy-Free Muffins: Camping Breakfast Tips

A simple, moist gluten-free dairy-free muffin recipe that holds up well on the trail, using pantry staples and no eggs.
- 2 cups gluten-free all-purpose flour blend (with xanthan gum)
- 1 teaspoon baking powder
- 1/2 teaspoon baking soda
- 1/2 teaspoon salt
- 1 teaspoon cinnamon (optional)
- 1/2 cup coconut oil (melted, or neutral oil)
- 1/2 cup maple syrup (or honey)
- 1 cup unsweetened applesauce (room temperature)
- 2 teaspoons vanilla extract
- 1/2 cup dairy-free milk (almond, oat, or rice milk)
- 1/2 cup dairy-free chocolate chips (optional, or chopped nuts)
- Preheat the oven to 350°F (175°C). Line a 12-cup muffin tin with paper liners or grease with oil.
- In a large bowl, whisk together the gluten-free flour, baking powder, baking soda, salt, and cinnamon (if using).
- In a separate bowl, mix the melted coconut oil, maple syrup, applesauce, vanilla, and dairy-free milk until well combined.
- Pour the wet ingredients into the dry ingredients and stir until just combined. Do not overmix – a few lumps are fine. Fold in chocolate chips or nuts if using.
- Divide the batter evenly among the muffin cups, filling each about 3/4 full.
- Bake for 18-22 minutes, or until a toothpick inserted in the center comes out clean. The tops should be golden and spring back when touched.
- Let the muffins cool in the pan for 5 minutes, then transfer to a wire rack to cool completely before packing for your trip.
Recipe: Gluten-Free Dairy-Free Muffins: Camping Breakfast Tips
Ingredients
- 2 cups gluten-free all-purpose flour blend (with xanthan gum)
- 1 teaspoon baking powder
- 1/2 teaspoon baking soda
- 1/2 teaspoon salt
- 1 teaspoon cinnamon (optional)
- 1/2 cup coconut oil (melted, or neutral oil)
- 1/2 cup maple syrup (or honey)
- 1 cup unsweetened applesauce (room temperature)
- 2 teaspoons vanilla extract
- 1/2 cup dairy-free milk (almond, oat, or rice milk)
- 1/2 cup dairy-free chocolate chips (optional, or chopped nuts)
Instructions
- Preheat the oven to 350°F (175°C). Line a 12-cup muffin tin with paper liners or grease with oil.
- In a large bowl, whisk together the gluten-free flour, baking powder, baking soda, salt, and cinnamon (if using).
- In a separate bowl, mix the melted coconut oil, maple syrup, applesauce, vanilla, and dairy-free milk until well combined.
- Pour the wet ingredients into the dry ingredients and stir until just combined. Do not overmix – a few lumps are fine. Fold in chocolate chips or nuts if using.
- Divide the batter evenly among the muffin cups, filling each about 3/4 full.
- Bake for 18-22 minutes, or until a toothpick inserted in the center comes out clean. The tops should be golden and spring back when touched.
- Let the muffins cool in the pan for 5 minutes, then transfer to a wire rack to cool completely before packing for your trip.