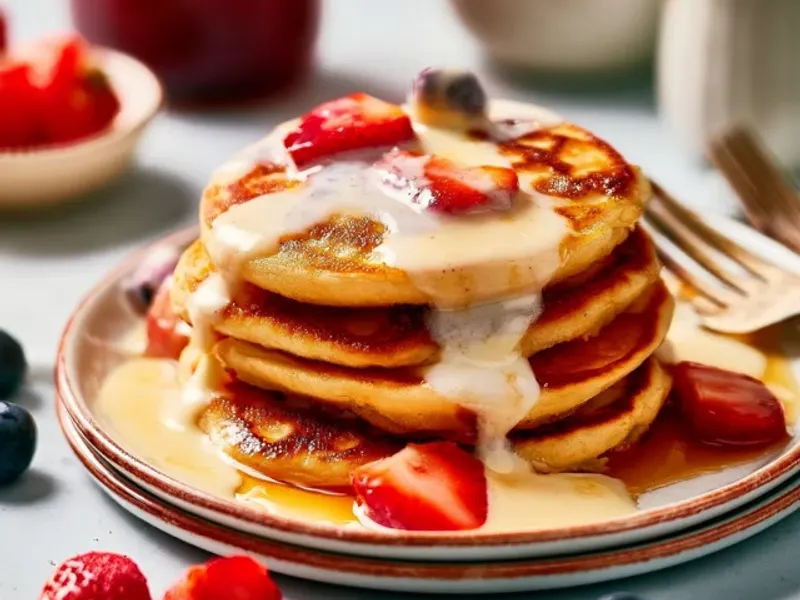
Gluten-Free Dairy-Free Pancakes for Camping
The smell of pancakes drifting out of the tent is pure camp magic, but if you're gluten-free and dairy-free, that magic often turns into a sad stare at a box of dry cereal. I've been there—mixing up a batch of gritty, crumbling disks that tasted more like cardboard than breakfast. After many camp stove experiments, I've landed on a method that yields fluffy, tender pancakes that don't fall apart, even when the wind is whipping and the coffee is barely ready. This recipe and technique are built for the campsite, not just the kitchen.

Why Most Gluten-Free Pancakes Fail at Camp
Gluten-free flours lack the stretch of wheat gluten, so they tend to produce dense, fragile pancakes. Add the challenge of a camp stove's uneven heat, and you get a recipe for disaster. The common mistake is treating gluten-free batter like regular pancake batter: mixing it too much, cooking it too hot, and expecting it to flip like a dream. Gluten-free batter is thinner, more delicate, and needs a gentler hand.
The other mistake is using a single flour blend. A simple mix of a gluten-free all-purpose blend plus a little almond flour gives structure and a hint of nuttiness. The almond flour also helps absorb moisture, preventing that gummy center. If you're nut-free, you can swap in an extra quarter cup of the all-purpose blend, but the texture will be slightly less tender.
The Perfect Camp Mix: Do It at Home
Before you leave, measure all the dry ingredients into a quart-size zip-top bag or a reusable container. This includes the flour blend, almond flour, sugar, baking powder, baking soda, and salt. Seal it, shake it, and you're done. At camp, you only need to add the wet ingredients—egg, non-dairy milk, and oil. This saves time and reduces the chance of a messy spill in a cramped camp kitchen.
If you want to go even further, you can make a "just add water" mix by using powdered non-dairy milk and skipping the egg (use a flax egg instead). But for most campers, a fresh egg is worth the cooler space—it gives a better lift.
Camp Stove Technique: Heat Control Is Everything
Here's the trick that changed my camp pancakes forever: let the batter rest for five minutes before cooking. This gives the gluten-free flours time to hydrate, which makes the batter thicker and less likely to spread into a thin, crispy mess. While it rests, preheat your skillet over medium-low heat. Most camp stoves run hot, so resist the urge to crank it. You want a gentle sizzle when a drop of water hits the pan, not a violent splatter.
Use a well-seasoned cast iron skillet if you have one—it holds heat evenly and gives a beautiful golden crust. If you're using a lightweight non-stick pan, keep the heat lower and watch closely. Add a small pat of coconut oil (or a neutral oil) and let it melt, then pour your batter using a 1/4 cup measure. Don't overcrowd the pan; two or three pancakes at a time is plenty.
When bubbles start to form on the surface and the edges look set, it's time to flip. Use a thin spatula and do it in one confident motion. Cook for another minute or two until the second side is browned and the pancake feels springy to the touch.
Adapting for Wind, Rain, and Cold Mornings
Wind is the enemy of a camp stove. It can blow out your flame or create hot spots. Set up a windbreak—a piece of aluminum foil folded into a U-shape works wonders, or position your stove behind a cooler. If it's raining, cook under your tent vestibule with the door partially open for ventilation, or use a camp stove in a covered area with proper airflow. Never cook inside a closed tent; carbon monoxide is a silent killer. Always keep your stove on a stable, heat-proof surface, and have a fire extinguisher or a bucket of water nearby.
On cold mornings, the batter might thicken up more than usual. Just add a splash of non-dairy milk to loosen it. If you're camping with kids, let them pour the batter into the pan (with supervision) and watch the bubbles form—it's a great way to keep them engaged while you manage the flipping.
Keeping Pancakes Warm and Toppings Simple
When you're cooking for a crowd, the first batch often gets cold by the time the last one is done. Here's a simple solution: place a clean towel on a plate, stack the cooked pancakes, and cover with another towel. The towels trap steam and keep them warm for up to 15 minutes. If you want to keep them hot for longer, wrap the stack in aluminum foil and place it in a small cooler with a hot water bottle (make sure it's sealed). This is a trick I use for big group breakfasts, and it works like a charm.
For toppings, keep it easy: maple syrup is a classic, but you can also bring along some fresh berries, sliced bananas, or a dollop of coconut yogurt. If you're feeling indulgent, a sprinkle of cinnamon or a drizzle of nut butter takes them to another level.
Food Safety and Cleanup
Any unused batter should be treated like any perishable—keep it in a cooler with ice if you're not cooking it right away. Cooked pancakes can be stored in a sealed container and eaten cold or reheated over the stove the next morning. When you're done, clean your skillet with hot water and a scraper, then dry it over low heat and rub a thin layer of oil to keep it seasoned.
Remember to store all food—including pancake mix and toppings—in bear-proof containers or hung properly if you're in bear country. Even the smell of maple syrup can attract unwanted visitors.
The Takeaway
Gluten-free dairy-free pancakes are absolutely doable at camp, but they require a little more patience and a few tweaks. Pre-mix your dry ingredients at home, let the batter rest, control your heat, and use a good pan. The result is a stack of golden, fluffy pancakes that make the morning feel like a treat, not a compromise. So next time you're packing the cooler, skip the sad cereal and bring your pancake mix. Your taste buds—and your camping crew—will thank you.
Frequently Asked Questions
Can I make gluten-free dairy-free pancake batter ahead of time?
Yes, but it's best to mix the dry ingredients at home and add the wet ingredients at camp. If you mix the full batter ahead, it will thicken and may need extra non-dairy milk. Store it in a sealed container in a cooler and stir well before cooking.
What's the best pan for making pancakes on a camp stove?
A well-seasoned cast iron skillet gives the best heat distribution and non-stick surface. If you're backpacking, a lightweight non-stick pan works, but you'll need to watch the heat more closely to avoid burning.
How do I keep pancakes warm while cooking the rest?
Place cooked pancakes on a plate covered with a clean towel or aluminum foil, and set it near the stove (but not directly on the flame). You can also wrap them in foil and put them in a small cooler with a hot water bottle to keep warm.
Gluten-Free Dairy-Free Pancakes for Camping

Fluffy gluten-free dairy-free pancakes made with a simple blend of rice flour and almond flour, cooked in a cast iron skillet over a camp stove. A reliable recipe for campers with dietary restrictions.
- 1 cup gluten-free all-purpose flour blend (with xanthan gum)
- 1/4 cup almond flour (or additional gluten-free flour blend)
- 2 tablespoons sugar (or maple syrup)
- 1 teaspoon baking powder
- 1/2 teaspoon baking soda
- 1/4 teaspoon salt
- 1 large egg (or flax egg for vegan)
- 1 cup unsweetened almond milk (or other non-dairy milk)
- 2 tablespoons coconut oil (melted, plus more for the pan)
- 1 teaspoon vanilla extract (optional)
- In a large bowl, whisk together the gluten-free flour blend, almond flour, sugar, baking powder, baking soda, and salt.
- In a separate bowl, beat the egg, then add the non-dairy milk, melted coconut oil, and vanilla. Whisk until combined.
- Pour the wet ingredients into the dry ingredients and stir until just combined. Let the batter rest for 5 minutes – this helps the flours hydrate.
- Place a cast iron skillet over medium heat on your camp stove. Add a small amount of coconut oil and let it melt, spreading it around.
- Pour 1/4 cup of batter per pancake. Cook until bubbles form on the surface and the edges look set, about 2-3 minutes.
- Flip and cook for another 1-2 minutes until golden brown and cooked through.
- Repeat with remaining batter, adding more oil to the pan as needed. Serve immediately with maple syrup or your favorite toppings.
Recipe: Gluten-Free Dairy-Free Pancakes for Camping
Ingredients
- 1 cup gluten-free all-purpose flour blend (with xanthan gum)
- 1/4 cup almond flour (or additional gluten-free flour blend)
- 2 tablespoons sugar (or maple syrup)
- 1 teaspoon baking powder
- 1/2 teaspoon baking soda
- 1/4 teaspoon salt
- 1 large egg (or flax egg for vegan)
- 1 cup unsweetened almond milk (or other non-dairy milk)
- 2 tablespoons coconut oil (melted, plus more for the pan)
- 1 teaspoon vanilla extract (optional)
Instructions
- In a large bowl, whisk together the gluten-free flour blend, almond flour, sugar, baking powder, baking soda, and salt.
- In a separate bowl, beat the egg, then add the non-dairy milk, melted coconut oil, and vanilla. Whisk until combined.
- Pour the wet ingredients into the dry ingredients and stir until just combined. Let the batter rest for 5 minutes – this helps the flours hydrate.
- Place a cast iron skillet over medium heat on your camp stove. Add a small amount of coconut oil and let it melt, spreading it around.
- Pour 1/4 cup of batter per pancake. Cook until bubbles form on the surface and the edges look set, about 2-3 minutes.
- Flip and cook for another 1-2 minutes until golden brown and cooked through.
- Repeat with remaining batter, adding more oil to the pan as needed. Serve immediately with maple syrup or your favorite toppings.