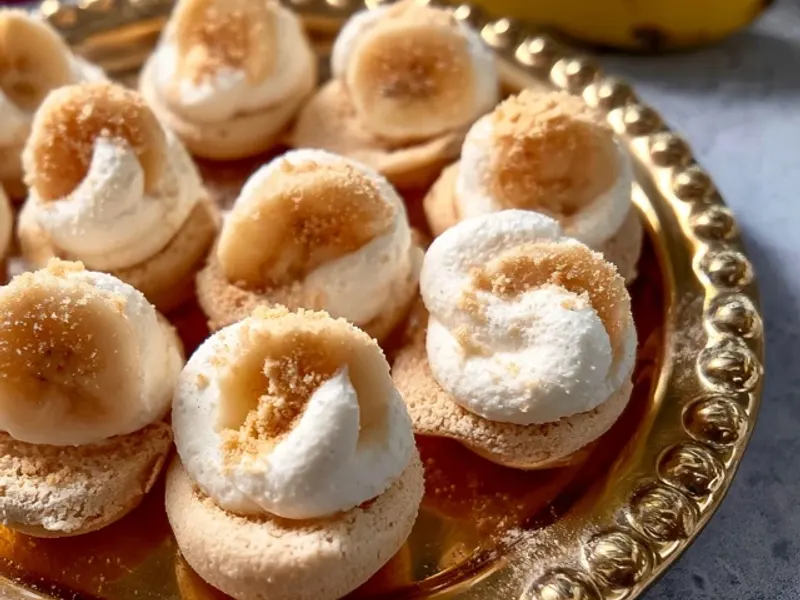
Healthy Kids Banana Bites for Camping
The first time I made these banana bites was on a trip where the kids were too hungry to wait for dinner and too picky to eat another granola bar. The smell of mashed banana and peanut butter mixed with the cool pine air—it just worked. These little bites are soft, sweet, and packed with energy. No baking, no fuss, and they come together in about fifteen minutes. That’s a win when you’re juggling tent stakes and tired little legs.

Why Banana Bites Work at Camp
Kids need fuel for hiking, climbing, and just being kids. But camp snacks often fall into two categories: sugary or stale. These bites sit in the middle—naturally sweet from ripe bananas, with oats for staying power and peanut butter for protein. They’re also forgiving. You can mix the ingredients in a bowl, no mixer required. And if a few oats end up on the tent floor, that’s just part of camping.
The Secret to a Good Bite (Hint: It’s the Banana)
Use bananas that are speckled brown. They’re sweeter and mash easier. Green bananas make the bites starchy and bland. I always pack one extra banana than I think I need—just in case one gets squished in the cooler. And if you’re camping in warm weather, keep the bites in a sealed container in the cooler. They’ll stay firm and refreshing.
Make Them Your Own
This recipe is a base, not a rule. Swap peanut butter for sunflower seed butter if you’re at a nut-free campsite. Add a tablespoon of ground flaxseed for extra fiber. Roll them in shredded coconut for a tropical twist. My favorite variation is adding a pinch of cinnamon—it pairs beautifully with the banana and makes the whole tent smell like breakfast.
One thing I’ve learned: if you’re camping with kids, let them help roll the bites. It’s a messy, fun activity that keeps them busy while you set up the tent. Just spread a clean towel on the camp table and let them go. They’ll eat their own creations with extra pride.
Packing and Storage Tips
These bites are sturdy enough for a day hike. Pack them in a small hard-sided container so they don’t get squished in a backpack. If you’re driving to the campsite, store them in the cooler with a layer of parchment paper between each bite to prevent sticking. They’ll last up to three days, but I’ve never seen them survive that long.
For a hot day, pop them in the cooler right before you leave. They’re also great as a quick breakfast—just add a piece of fruit and you’re set. And if you’re camping in bear country, remember to store all food, including these bites, in a bear-proof container or hung high. Always follow local wildlife safety rules.
Common Mistakes to Avoid
Don’t overmix the dough. You want some texture from the oats, not a paste. Also, don’t skip the chilling step. It helps the bites hold their shape, especially if you’re not eating them right away. If the mixture seems too dry, add a tiny splash of milk or water. Too sticky? Add more oats, a tablespoon at a time.
What to Do With Leftovers
If you somehow have extra bites, crumble them over yogurt for a campfire parfait. Or just eat them for breakfast the next morning—they’re that good. You can also freeze them at home before your trip. They thaw quickly in the cooler and taste just as fresh.
Takeaway
Healthy kids banana bites are more than a snack—they’re a little moment of calm at the campsite. They’re easy to make, easy to pack, and easy to love. Next time you’re planning a trip with little ones, throw these together before you leave. Your future self (and your kids’ tummies) will thank you.
Frequently Asked Questions
Can I make these banana bites ahead of time?
Yes! They keep in a sealed container in the cooler for up to 3 days. Layer them with parchment paper so they don’t stick. If it’s hot, keep them cool; they’ll still be safe, just softer.
What if my kids don’t like oats?
Swap the oats for crushed graham crackers or finely chopped nuts (if no allergies). You can also roll the bites in shredded coconut for extra texture and sweetness. The banana and peanut butter hold everything together, so get creative.
Are these okay for a no-nut campsite?
Absolutely. Use sunflower seed butter or soy nut butter instead of peanut butter. Check the labels for cross-contamination if allergies are severe. Sunflower butter works just as well and gives a slightly different flavor that kids often love.
Healthy Kids Banana Bites for Camping

No-bake banana bites made with ripe bananas, oats, and peanut butter—perfect for a quick, healthy snack at the campsite. They’re soft, chewy, and easy for little hands to grab.
- 2 medium ripe bananas, mashed (the riper, the sweeter)
- 1 cup old-fashioned oats (or quick oats)
- 1/2 cup natural peanut butter (or any nut/seed butter)
- 1/4 cup mini chocolate chips (optional but a hit with kids)
- 1/2 tsp vanilla extract (pure or imitation both work)
- 1 pinch salt (if your nut butter is unsalted)
- In a medium bowl, mash the bananas with a fork until mostly smooth. A few lumps are fine—they add texture.
- Stir in the peanut butter and vanilla until well combined. The mixture should look like a thick paste.
- Fold in the oats, chocolate chips (if using), and salt. Mix until everything is evenly coated. If the dough feels too sticky, add another tablespoon of oats. If too dry, add a tiny splash of milk or water.
- Let the mixture rest for 5 minutes so the oats can absorb some moisture. This makes it easier to roll.
- Scoop out rounded tablespoons of the mixture and roll into balls with your hands. For smaller kids, make teaspoon-sized bites.
- Place the bites on a plate or in a container lined with parchment paper. Refrigerate for at least 30 minutes to firm up—this helps them hold their shape in a cooler.
- Store in an airtight container in the cooler. They’ll keep for up to 3 days, though they rarely last that long.
Recipe: Healthy Kids Banana Bites for Camping
Ingredients
- 2 medium ripe bananas, mashed (the riper, the sweeter)
- 1 cup old-fashioned oats (or quick oats)
- 1/2 cup natural peanut butter (or any nut/seed butter)
- 1/4 cup mini chocolate chips (optional but a hit with kids)
- 1/2 tsp vanilla extract (pure or imitation both work)
- 1 pinch salt (if your nut butter is unsalted)
Instructions
- In a medium bowl, mash the bananas with a fork until mostly smooth. A few lumps are fine—they add texture.
- Stir in the peanut butter and vanilla until well combined. The mixture should look like a thick paste.
- Fold in the oats, chocolate chips (if using), and salt. Mix until everything is evenly coated. If the dough feels too sticky, add another tablespoon of oats. If too dry, add a tiny splash of milk or water.
- Let the mixture rest for 5 minutes so the oats can absorb some moisture. This makes it easier to roll.
- Scoop out rounded tablespoons of the mixture and roll into balls with your hands. For smaller kids, make teaspoon-sized bites.
- Place the bites on a plate or in a container lined with parchment paper. Refrigerate for at least 30 minutes to firm up—this helps them hold their shape in a cooler.
- Store in an airtight container in the cooler. They’ll keep for up to 3 days, though they rarely last that long.