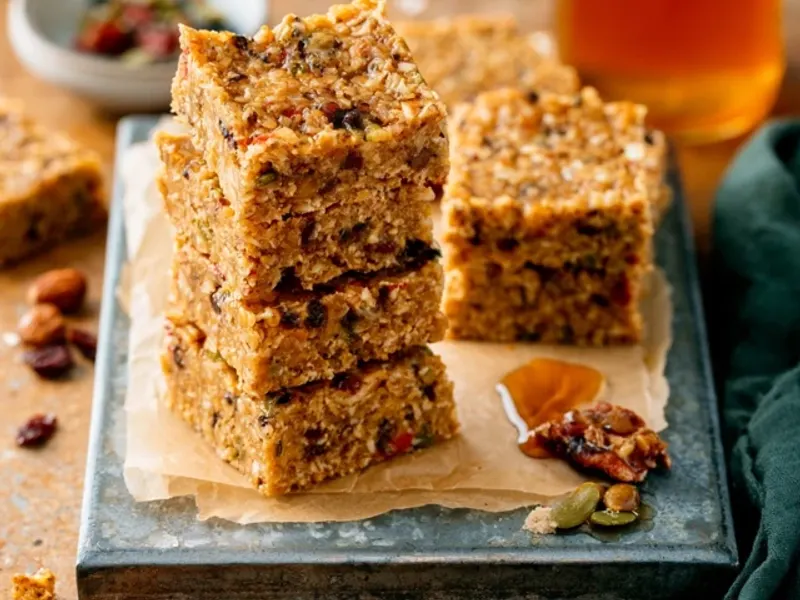
Healthy Kids Granola Bars for Camping
The first time I packed store-bought granola bars for a camping trip, my kids ate two and then traded the rest for a handful of trail mix. The second time, I made these at home on a rainy Sunday, and the difference was night and day. These healthy kids granola bars are chewy, not too sweet, and tough enough to survive a hike in a backpack without turning to crumbs.

There's something about the smell of oats and honey mixing in a warm pan that feels like camp itself. And when you pull out a homemade bar at the trailhead, you get that quiet pride of knowing exactly what's in it—no weird additives, no excessive sugar, just real food.
Why Make Your Own for Camping?
Store-bought bars often list sugar as the first ingredient or rely on syrups that leave a sticky film in your mouth. When you make your own, you control the sweetness and the texture. Plus, they're far more economical when you're feeding a crew of hungry campers.
The real win, though, is customizability. My kids love dried cranberries; maybe yours prefer chopped apricots or raisins. Swap the sunflower seeds for pumpkin seeds or add a handful of shredded coconut. This recipe is a template, not a rule.
Key Techniques for Chewy, Not Crumbly, Bars
The biggest mistake I see in homemade granola bars is not pressing them firmly enough. If you don't compact the mixture into the pan, the bars will fall apart the moment you pick one up. Use your hands or the bottom of a measuring cup to press down with real force—you want the surface smooth and dense.
Another trick: warm the wet ingredients gently, just until the seed butter and honey loosen up. If you overheat them, the mixture becomes too runny and the bars turn greasy. Low heat, stir constantly, and you're good.
Chilling is non-negotiable. Two hours in the fridge gives the coconut oil time to set. If you're camping in warm weather, keep the bars in the cooler until you're ready to eat. They'll soften if left in the sun, but they still taste great.
Packing and Storage Tips for Camp
Wrap each bar individually in parchment paper or beeswax wrap. This makes them easy to grab on the go and keeps them from sticking together. Place them in a sturdy container or zip-top bag, and store in the cooler with the rest of your perishables.
If you're hiking with kids, hand each one a bar before you set off. It gives them energy for the trail and prevents the inevitable 'I'm hungry' complaint twenty minutes in. For shorter trips, you can skip the cooler and just keep them in your backpack—they'll last a day or two without refrigeration.
Safety Note for Cooler Storage
Remember to keep raw meats and seafood separate from ready-to-eat foods like these bars. Use a sealed container or a separate cooler if possible. And always wash your hands before handling the bars at the campsite—especially after touching raw food or campfire wood.
Adapting for Different Camping Scenarios
If you're camping in hot, humid weather, the chocolate chips might melt. Swap them for cacao nibs or just leave them out—the bars are still delicious. For cold-weather camping, these bars are a great high-energy snack that won't freeze solid like fruit or cheese.
If you're camping with very young kids, you can make the bars softer by adding an extra tablespoon of coconut oil or a splash of milk. That makes them easier to chew for toddlers but still holds together. For older kids, you can add a bit more oats for crunch.
Final Takeaway
Homemade healthy kids granola bars are a camping game-changer. They're simple to make, easy to pack, and far more satisfying than anything from a box. Spend fifteen minutes before your trip, and you'll have a snack that keeps everyone happy from the trailhead to the tent. And when you see your kids reach for a second bar instead of a bag of chips, you'll know it was worth it.
Frequently Asked Questions
Are these granola bars safe for nut-free campsites?
Yes, this recipe uses sunflower seed butter instead of peanut or almond butter. Always check labels on oats and chocolate chips to ensure they're processed in a nut-free facility if you have severe allergies.
How do I keep granola bars from melting in warm weather?
Store them in a sealed container in the cooler, not in direct sun. If they get soft, pop them in the fridge or shade for 10 minutes before eating. For hot hikes, wrap each bar individually in parchment and keep them in an insulated lunch bag.
Can I make these bars ahead of time?
Absolutely. They keep well in an airtight container for up to a week at home or in the cooler at camp. For longer trips, freeze them and thaw overnight in the cooler.
Healthy Kids Granola Bars for Camping

These no-bake healthy kids granola bars are chewy, naturally sweetened, and packed with oats, seeds, and dried fruit. Perfect for camping breakfasts or trail snacks.
- 2 cups old-fashioned rolled oats (gluten-free if needed)
- 1/2 cup sunflower seed butter (or other nut-free seed butter)
- 1/3 cup honey (or maple syrup for vegan)
- 1 tsp vanilla extract
- 1/4 cup coconut oil (melted)
- 1/2 cup dried cranberries (or raisins)
- 1/4 cup mini chocolate chips (optional, use dairy-free if needed)
- 1/4 cup sunflower seeds (or pumpkin seeds)
- 1/2 tsp cinnamon
- 1/4 tsp salt
- Line an 8x8-inch baking dish with parchment paper, leaving overhang on two sides.
- In a large bowl, mix the rolled oats, dried cranberries, sunflower seeds, cinnamon, and salt.
- In a small saucepan over low heat, warm the sunflower seed butter, honey, coconut oil, and vanilla extract, stirring until smooth and fully combined.
- Pour the wet mixture over the dry ingredients and stir until every oat is coated.
- Fold in the mini chocolate chips if using.
- Press the mixture firmly into the prepared dish using a spatula or your hands. Press hard to compact it—this prevents crumbly bars.
- Refrigerate for at least 2 hours until set.
- Lift the parchment out of the dish, place on a cutting board, and slice into 12 bars.
- Wrap individually in parchment paper or store in an airtight container. At camp, keep in the cooler until ready to eat.
Recipe: Healthy Kids Granola Bars for Camping
Ingredients
- 2 cups old-fashioned rolled oats (gluten-free if needed)
- 1/2 cup sunflower seed butter (or other nut-free seed butter)
- 1/3 cup honey (or maple syrup for vegan)
- 1 tsp vanilla extract
- 1/4 cup coconut oil (melted)
- 1/2 cup dried cranberries (or raisins)
- 1/4 cup mini chocolate chips (optional, use dairy-free if needed)
- 1/4 cup sunflower seeds (or pumpkin seeds)
- 1/2 tsp cinnamon
- 1/4 tsp salt
Instructions
- Line an 8x8-inch baking dish with parchment paper, leaving overhang on two sides.
- In a large bowl, mix the rolled oats, dried cranberries, sunflower seeds, cinnamon, and salt.
- In a small saucepan over low heat, warm the sunflower seed butter, honey, coconut oil, and vanilla extract, stirring until smooth and fully combined.
- Pour the wet mixture over the dry ingredients and stir until every oat is coated.
- Fold in the mini chocolate chips if using.
- Press the mixture firmly into the prepared dish using a spatula or your hands. Press hard to compact it—this prevents crumbly bars.
- Refrigerate for at least 2 hours until set.
- Lift the parchment out of the dish, place on a cutting board, and slice into 12 bars.
- Wrap individually in parchment paper or store in an airtight container. At camp, keep in the cooler until ready to eat.