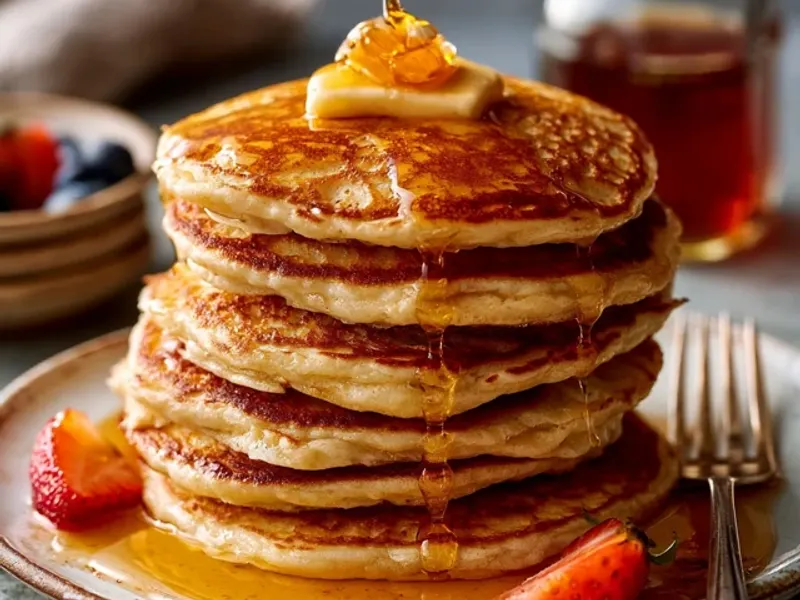
Make-Ahead Pancakes for Camping: Mix, Freeze, Flip
The first time I tried to make pancakes at a campsite, the wind was whipping, the griddle was too hot, and the batter had lumps the size of pebbles. I swore I'd never go back to mixing from scratch at 7 a.m. again. That's when I started making pancakes ahead—and it's been a game-changer for every trip since.

Make-ahead pancakes aren't just about convenience. They save you precious mornings, reduce dishes, and let you actually enjoy your coffee while the kids wait (impatiently) for breakfast. Here's how to do it three ways: a dry mix, a frozen batter, and fully cooked stacks. Each has its place depending on your trip style.
Why Make-Ahead Works So Well for Camping
When you're camping, mornings are for adventure, not for measuring flour and buttermilk. Prepping at home means you control the quality and the mess. You also avoid the classic campground problem: a cold, windy morning where your baking powder has gone stale and your eggs are rolling off the table.
Plus, if you're camping with kids, make-ahead pancakes mean they can help pour and flip without you hovering over a messy mixing bowl. It's a small win, but on day three of a trip, it feels huge.
The Dry Mix Method: Just Add Wet
This is the simplest and most reliable. Make a big batch of dry mix at home and store it in a quart-size jar or a sturdy zip-top bag. For one batch, combine 2 cups flour, 2 tablespoons sugar, 1 tablespoon baking powder, 1/2 teaspoon baking soda, and 1/2 teaspoon salt. Shake it well.
At the campsite, you only need to add the wet ingredients. I like to pre-measure the buttermilk, eggs, and melted butter into a separate leak-proof container and keep it in the cooler. Then, when you're ready, pour the wet into the dry, stir with a fork until just combined—lumps are okay—and you're ready to cook.
One trick: write the wet ingredient amounts on the jar with a permanent marker. That way, you don't have to remember if it was 2 cups or 1.5 cups of liquid. It's a small detail that saves you from a pancake disaster.
The Frozen Batter Method: Thaw and Pour
If you want to skip even the mixing at camp, freeze the batter. Make the full batter at home, pour it into a freezer-safe zip-top bag, and lay it flat in the freezer. It'll keep for up to three months.
When you're packing, move the bag to the cooler. It will thaw slowly overnight. By morning, you'll have a cold, ready-to-pour batter. Give it a good shake or stir—it will separate, and that's normal. If it's too thick, add a tablespoon of milk or water.
The biggest mistake here is forgetting to move it from the freezer to the cooler. I've done that, and you end up with a frozen brick. So put a reminder on your packing list: “Move pancake batter to cooler.”
The Cooked-and-Reheat Method
For the ultimate low-effort morning, cook a double batch at home, stack them with parchment paper in between, and wrap the whole stack in foil. At the campsite, you can reheat them on a cast iron griddle or over a campfire grate. They won't be as fluffy as fresh, but they'll be warm and satisfying.
To reheat, place the foil-wrapped stack over low heat for about 10 minutes, flipping once. Or, if you have a Dutch oven, put the wrapped stack inside with the lid on for a few minutes. Just don't use direct high heat—you'll burn the outside and leave the middle cold.
Camp Stove Pancake Technique
On a camp stove, heat control is everything. Most camp stoves have hot spots, so use a cast iron griddle—it distributes heat evenly. Preheat it over medium-low for at least five minutes. Test it with a few drops of water: if they sizzle and evaporate quickly, it's ready.
Use a 1/4-cup measuring cup to pour consistent pancakes. Cook until bubbles form on the surface and the edges look set—about 2-3 minutes. Then flip. Resist the urge to press down with the spatula; that just makes them dense.
If you're cooking for a crowd, keep the cooked pancakes in a foil packet in a cooler (or a warm spot) while you finish the batch. Or, better yet, have a second griddle going.
Weather and Wind Considerations
Wind is the enemy of camp cooking. It can cool your griddle and blow your paper plates away. Set up your stove in a sheltered spot—behind a car, a large rock, or a windbreak. If it's really gusty, use a windscreen around the stove, but always leave space for airflow and never block the burner completely.
Rain? Cook under your tent vestibule or a tarp, but never inside a closed tent. Also, keep your dry mix in a waterproof container; humidity can clump it and ruin the texture.
Safety Notes for Cooking at Camp
Always use your camp stove on a stable, level surface, away from tent walls and flammable gear. Never leave a lit stove unattended. And when you're done, let the griddle cool completely before packing it away.
If you're cooking over a campfire, make sure the fire is fully extinguished before you leave the site. And keep your pancake batter and cooked pancakes in a cooler with ice packs; don't leave them out in the sun—that's a recipe for food poisoning, not a good breakfast.
Make-Ahead Pancake Variations
Don't be afraid to customize your dry mix. Add a tablespoon of cinnamon, a handful of chocolate chips, or some dried blueberries. Just remember that add-ins like chocolate chips may melt and stick to the griddle, so add them to the batter, not the pan.
For a healthier option, swap half the flour for whole wheat and add a tablespoon of flaxseed meal. The texture will be denser, but the flavor is great.
Takeaway
Make-ahead pancakes are the ultimate camping breakfast hack. Whether you go with a dry mix, frozen batter, or pre-cooked stacks, you'll save time, stress, and dishes. The key is to prep before you leave and keep your technique simple at the campsite. The next time you're sitting by the fire with a plate of hot pancakes, you'll wonder why you ever did it any other way.
Frequently Asked Questions
Can I freeze pancake batter for camping?
Yes, you can freeze pancake batter for up to 3 months. Store it in a sealed freezer bag or container, leaving room for expansion. Thaw it in the cooler overnight before cooking. Give it a good stir—it may separate, but that's normal.
How do I keep cooked pancakes warm at the campsite?
Wrap cooked pancakes in aluminum foil and place them in a insulated bag or a Dutch oven with a warm (not hot) towel. They'll stay warm for about 30 minutes. For longer, reheat on the griddle just before serving.
What's the best way to cook pancakes on a camp stove?
Use a cast iron griddle for even heat. Preheat it over medium-low for 5 minutes, then test with a drop of water—it should sizzle and evaporate. Cook until bubbles form and edges look set, then flip. Avoid high heat, which burns the outside and leaves the middle doughy.
Make-Ahead Pancakes for Camping: Mix, Freeze, Flip

Make-ahead camping pancakes using a DIY dry mix and a frozen batter option. Both methods save time at the campsite and give you fluffy, hot pancakes without the morning mess.
- 2 cups all-purpose flour
- 2 tablespoons granulated sugar
- 1 tablespoon baking powder
- 1/2 teaspoon baking soda
- 1/2 teaspoon salt
- 2 cups buttermilk (or 2 cups milk + 2 tbsp lemon juice, let sit 5 min)
- 2 large eggs
- 3 tablespoons melted butter (plus more for griddle)
- 1 teaspoon vanilla extract (optional)
- In a large bowl, whisk together the flour, sugar, baking powder, baking soda, and salt.
- In another bowl, beat the eggs, then add the buttermilk, melted butter, and vanilla. Whisk to combine.
- Pour the wet ingredients into the dry and stir until just combined. Lumps are fine—don't overmix.
- For camping: portion the dry mix into a jar or zip-top bag. Mix the wet ingredients in a separate container and refrigerate until you leave.
- At the campsite, combine the wet and dry ingredients, stirring gently until just moistened.
- Preheat a cast iron griddle over medium-low heat. Add a pat of butter and spread it around.
- Pour 1/4 cup of batter per pancake. Cook until bubbles form on the surface and the edges look set, about 2-3 minutes.
- Flip and cook for another 1-2 minutes until golden brown. Serve immediately or keep warm in foil.
Recipe: Make-Ahead Pancakes for Camping: Mix, Freeze, Flip
Ingredients
- 2 cups all-purpose flour
- 2 tablespoons granulated sugar
- 1 tablespoon baking powder
- 1/2 teaspoon baking soda
- 1/2 teaspoon salt
- 2 cups buttermilk (or 2 cups milk + 2 tbsp lemon juice, let sit 5 min)
- 2 large eggs
- 3 tablespoons melted butter (plus more for griddle)
- 1 teaspoon vanilla extract (optional)
Instructions
- In a large bowl, whisk together the flour, sugar, baking powder, baking soda, and salt.
- In another bowl, beat the eggs, then add the buttermilk, melted butter, and vanilla. Whisk to combine.
- Pour the wet ingredients into the dry and stir until just combined. Lumps are fine—don't overmix.
- For camping: portion the dry mix into a jar or zip-top bag. Mix the wet ingredients in a separate container and refrigerate until you leave.
- At the campsite, combine the wet and dry ingredients, stirring gently until just moistened.
- Preheat a cast iron griddle over medium-low heat. Add a pat of butter and spread it around.
- Pour 1/4 cup of batter per pancake. Cook until bubbles form on the surface and the edges look set, about 2-3 minutes.
- Flip and cook for another 1-2 minutes until golden brown. Serve immediately or keep warm in foil.