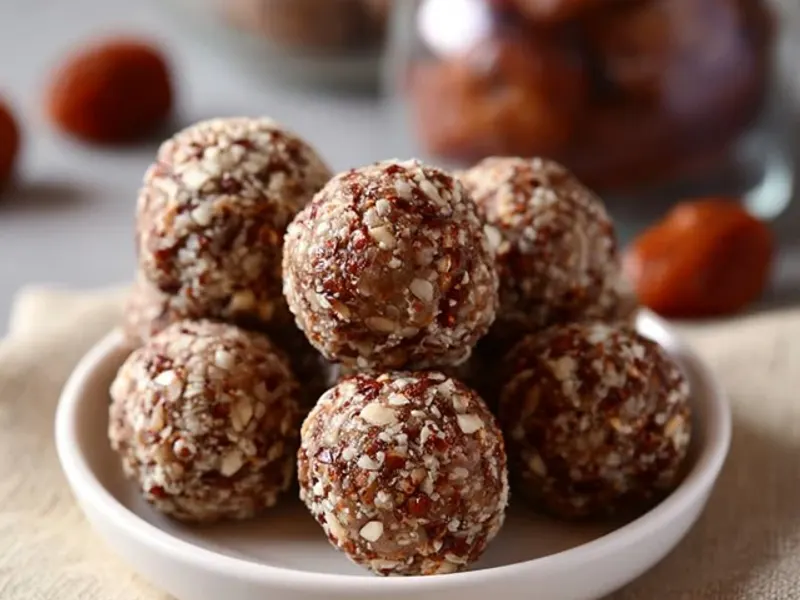
No-Bake Energy Balls Kids Love (Camping Snack)
There's a certain rhythm to a camping afternoon: the kids are buzzing with energy, the sun is warm, and the only thing between them and a meltdown is a snack that's both satisfying and simple. That's where no-bake kids energy balls come in. They're the unsung heroes of the camp kitchen—no stove, no oven, no fuss. Just a bowl, a spoon, and a handful of ingredients that turn into little bites of fuel that kids actually want to eat.

I've made these on countless trips, and the best part is watching a kid who swore they didn't like oats go back for a third ball. The key is getting the texture right—sticky enough to hold together but not so sticky that they're a mess to roll. And when you're at a campsite with no running water, you want something that doesn't leave your hands coated in goo. So let's get into the method, because it's all about technique.
Why These Work at Camp
First, they're no-bake, which means no heat source required. That's huge when you're trying to keep a camp stove free for dinner or when the weather is too hot to even think about turning on a flame. Second, they're durable. Unlike fresh fruit or yogurt, these balls don't squish or spoil quickly. They can sit in a backpack for a few hours and still be perfectly snackable. Third, they're customizable. You can swap ingredients based on what you have or what your kids tolerate.
But the real reason they shine at camp is that they're a hands-on activity. Kids can help measure, stir, and roll. It's a way to involve them in meal prep without any sharp objects or hot surfaces. Plus, it gives them ownership—they're more likely to eat something they helped make.
The Simple Method (No Fancy Tools Needed)
Here's the thing: you don't need a food processor. A bowl and a sturdy fork or spatula work fine. Start with your oats. If you have old-fashioned rolled oats, they give a nice chewy texture. For younger kids, you might want to pulse them in a blender first to make them finer—but that's optional. Then add your peanut butter (or any nut/seed butter), honey, and a pinch of salt. Stir until it starts to clump together. That's your baseline.
Now, the trick that makes these better than most recipes: let the mixture sit for five minutes before rolling. This gives the oats time to absorb some moisture, making the balls easier to shape and less crumbly. It's a small step, but it's the difference between balls that fall apart in your cooler and ones that hold their shape until the last bite.
If the mixture feels too dry, add a teaspoon of honey or water. If it's too sticky, add a tablespoon of oats. You're aiming for a consistency that's like slightly damp sand—it should press together without sticking to your fingers excessively. A light coating of water on your hands helps if things get sticky.
Rolling with Kids
Set up a little assembly line. Give each kid a small bowl of mixture and let them roll their own. It's messy, but that's part of the fun. You can also use a cookie scoop to portion out uniform balls, which makes it easier for tiny hands. Aim for about 1-inch balls—big enough to be satisfying but small enough to be a snack, not a meal.
Adapting for Weather and Terrain
Camping is unpredictable, and your snack should be too. On a hot day, chocolate chips might turn into a melty mess. Swap them for dried cranberries, raisins, or cacao nibs. If you're in a humid environment, the balls can get sticky on the outside. Roll them in a little shredded coconut or cocoa powder after shaping—it keeps them from sticking together in the container and adds a nice texture.
For cold weather camping, these are fantastic. They provide quick energy and don't freeze solid like some other snacks. You can keep them in your pocket for a hike and they'll stay pliable. Just be aware that in very cold temps, the honey might stiffen, so let them come to room temperature for a few minutes before eating.
Storing and Packing for the Trail
Storage is where most people go wrong. You can't just toss them in a backpack and hope for the best. Use a hard-sided container, like a small Tupperware or a mason jar, to prevent squishing. If you're hiking, a lightweight silicone bag works too. Layer them with parchment paper between layers so they don't stick together.
If you're car camping, a cooler is your friend. They don't need to be refrigerated, but keeping them cool helps them hold their shape. On a day trip, pop them in a small insulated lunch bag with an ice pack. They'll stay fresh for hours.
Common Mistake to Avoid
One mistake I see a lot is adding too much liquid. People think the mixture needs to be wet to stick, but that just makes it sticky and hard to handle. The oats will absorb moisture over time, so a slightly dry mixture is actually better. Also, don't skip the flaxseed—it's not just for nutrition; it acts as a binder that helps the balls stay together. If you don't have flax, chia seeds work too.
Safe Snacking at Camp
Food safety is no joke, especially with kids. Keep your energy balls in a sealed container and out of direct sunlight. If the temperature is above 80°F, they should be in a cooler. Also, remember to store them away from your tent at night—any food can attract wildlife. Use a bear canister or hang them in a bag from a tree if you're in bear country. Check local regulations for specific advice.
When you're ready to eat, make sure hands are washed or use a napkin. It's easy to forget at camp, but a quick wipe with a wet wipe works in a pinch.
Making Them Your Own
The beauty of these energy balls is that they're a blank canvas. Add a tablespoon of chia seeds for extra crunch. Swap honey for maple syrup to make them vegan. Use sunflower seed butter if someone has a nut allergy. You can even add a few drops of peppermint extract for a refreshing twist. The ratios stay the same—just keep the wet-to-dry balance in mind.
For a fun camping activity, have each kid create their own flavor. Set out bowls of mix-ins like coconut, dried fruit, and seeds, and let them customize their batch. It's a great way to spend a slow afternoon at the campsite, and you'll end up with a variety of snacks that everyone is excited about.
The Takeaway
No-bake kids energy balls are more than just a recipe—they're a camping tool. They solve the 'I'm hungry' whine before it starts, give kids a sense of independence, and keep everyone fueled for the next adventure. With a little prep at home or even at the campsite, you'll have a snack that's as reliable as your favorite tent. So next time you're packing, set aside fifteen minutes to roll a batch. Your future self (and your kids) will thank you.
Frequently Asked Questions
How long do no-bake energy balls last at camp?
In a sealed container kept out of direct sun, they last 2–3 days at typical spring/fall temperatures. In summer heat, store them in a cooler with an ice pack. They also freeze well for up to 3 months, so you can make them ahead and thaw overnight.
Can I make energy balls without a food processor?
Absolutely. Use creamy peanut butter and finely ground oats (blitz them in a blender or use quick oats). Mash everything with a fork or your hands until it sticks together. The texture will be slightly chunkier, but kids won't mind.
How do I keep energy balls from melting in warm weather?
Swap chocolate chips for cacao nibs or dried fruit. Use sunflower seed butter instead of peanut butter if it's very hot. Keep them in a cooler near the bottom, away from ice packs that might crush them. A small insulated lunch bag works well for a day hike.
No-Bake Energy Balls Kids Love (Camping Snack)

These no-bake energy balls are a camping lifesaver: no oven, no stove, just mix, roll, and go. They're sweet, chewy, and packed with oats, peanut butter, and honey—perfect for hungry kids on the trail.
- 1 cup old-fashioned rolled oats (use quick oats for a softer texture)
- 1/2 cup creamy peanut butter (or any nut/seed butter)
- 1/3 cup honey (or maple syrup for vegan)
- 1/4 cup mini chocolate chips (optional, or use dried cranberries)
- 1/4 cup ground flaxseed (adds fiber and helps bind)
- 1/2 teaspoon vanilla extract
- 1 pinch salt (optional, balances sweetness)
- In a medium bowl, combine oats, peanut butter, honey, chocolate chips, flaxseed, vanilla, and salt.
- Stir with a sturdy spoon until everything is evenly mixed. The mixture should hold together when pressed.
- If it's too dry, add a teaspoon of honey or water. If too sticky, add a tablespoon of oats.
- Scoop out heaping tablespoonfuls and roll into 1-inch balls with your hands.
- Place on a plate or tray and refrigerate for 15 minutes to firm up (optional but helps them hold shape).
- Store in an airtight container. At camp, keep in a cooler or shade.
Recipe: No-Bake Energy Balls Kids Love (Camping Snack)
Ingredients
- 1 cup old-fashioned rolled oats (use quick oats for a softer texture)
- 1/2 cup creamy peanut butter (or any nut/seed butter)
- 1/3 cup honey (or maple syrup for vegan)
- 1/4 cup mini chocolate chips (optional, or use dried cranberries)
- 1/4 cup ground flaxseed (adds fiber and helps bind)
- 1/2 teaspoon vanilla extract
- 1 pinch salt (optional, balances sweetness)
Instructions
- In a medium bowl, combine oats, peanut butter, honey, chocolate chips, flaxseed, vanilla, and salt.
- Stir with a sturdy spoon until everything is evenly mixed. The mixture should hold together when pressed.
- If it's too dry, add a teaspoon of honey or water. If too sticky, add a tablespoon of oats.
- Scoop out heaping tablespoonfuls and roll into 1-inch balls with your hands.
- Place on a plate or tray and refrigerate for 15 minutes to firm up (optional but helps them hold shape).
- Store in an airtight container. At camp, keep in a cooler or shade.