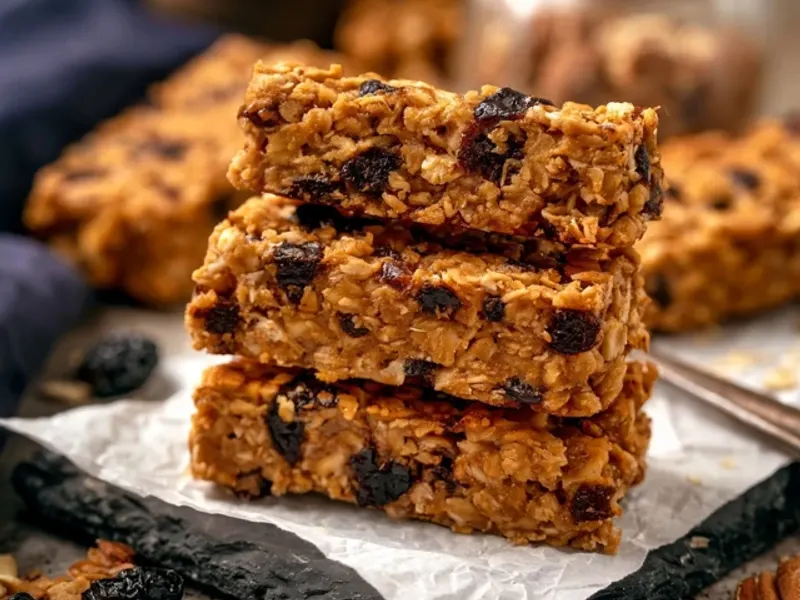
No-Bake Kids Granola Bars for Camping
The first time I made these bars, I was standing in a tiny camp kitchen with a sticky spatula and a toddler tugging at my sleeve. No oven, no fuss—just a bowl, a pan, and a fridge (or a cool spot in the tent). That's the beauty of no-bake granola bars: they're forgiving, fast, and perfect for little hands. On a camping trip, they're the snack that saves the day when someone declares they're 'starving' between hikes and the next meal is an hour away.

These bars are more than a recipe—they're a method for keeping kids fueled and happy outdoors. The trick isn't just the ingredients; it's the technique of pressing them firmly enough so they hold together, and knowing how to adapt them to your campsite's conditions. Let's get into it.
Why No-Bake Works for Camping
No-bake means no stove, no fuel, no waiting for an oven to heat up. You can even mix the whole batch at home and just pack the bars. But if you're making them at the campsite, you only need a pot for warming the binder—or you can skip that too by using a liquid sweetener like honey at room temperature, though it's easier to mix when slightly warm.
The real win is texture. These bars are chewy, not crunchy, which means they won't crumble into a thousand pieces in a backpack. They also hold up better in warm weather than chocolate-dipped treats, especially if you keep them in a cooler.
The Perfect Binder Ratio
The secret to a bar that stays together is the ratio of wet to dry. I use 1/2 cup peanut butter and 1/2 cup honey for every 2 cups of oats and 1 cup of cereal. That's a 1:1 wet-to-dry-ish ratio that clumps nicely. If you add too many add-ins like chocolate chips, the bars get crumbly. Keep add-ins to about 1/2 cup total.
When you mix, make sure every oat is coated. Then press the mixture into the pan with serious pressure. I use the bottom of a measuring cup to compact it—this is the step most people skip, and it's why their bars fall apart. Press until the surface is smooth and firm, like you're packing snow for a snowball.
Adapting for Weather and Campsite Conditions
If it's hot out, the bars may get soft. That's fine—they'll still taste great, but they won't hold their shape. To firm them up, pop them in a cooler for 30 minutes before serving. If you're at a site without a cooler, make the bars at home, freeze them, and pack them in a sealed container. They'll thaw slowly and stay firm for the first day.
In humid weather, the bars can become sticky. Wrap each bar individually in parchment paper to keep them from gluing together. This also makes them easy to hand out on the trail.
Kid-Friendly Customizations
Let kids pick their add-ins. Some favorites: mini chocolate chips, dried strawberries, or crushed pretzels. For a fun surprise, press a few chocolate chips on top before chilling—they'll stick and make the bars look like a treat.
If you're avoiding nuts, sunflower seed butter works perfectly. Just be aware that it can turn greenish when mixed with certain ingredients (a harmless reaction), so don't be alarmed. For a nut-free and school-safe version, use tahini or soy nut butter.
Storage and Packing Tips
These bars keep well for a week in an airtight container. For camping, wrap each bar in parchment or beeswax wrap, then stack them in a hard-sided container to prevent squishing. If you're hiking, place them on top of your pack, not at the bottom.
One trick I use: freeze the wrapped bars before a trip. They act as ice packs in the cooler, and by the time you need them, they're perfectly chewy.
Safety Notes for Camping with Kids
Always store food in bear-proof containers or hang it properly if you're in bear country. Even sweet granola bars can attract wildlife. Also, keep the bars away from tent walls—sweeter smells can linger and invite ants. And remember, no cooking means no campfire risk, but if you're using a stove to warm the binder, never do it inside a tent due to carbon monoxide danger.
Make-Ahead and Freezer Options
You can double the recipe and freeze half. Cut the bars, wrap individually, and store in a freezer bag. They thaw in about 15 minutes at room temperature. This is a huge time-saver for busy camp mornings.
For a gluten-free version, use certified gluten-free oats and check your cereal. Most crispy rice cereals are gluten-free, but always read labels.
Final Takeaway
No-bake granola bars are the ultimate camping snack for kids because they're simple, sturdy, and endlessly customizable. The key is pressing firmly and adapting to your environment. Make a batch before your next trip, and you'll have happy, fueled-up kids ready for adventure.
Frequently Asked Questions
How long do no-bake granola bars last?
Stored in an airtight container, they stay fresh for up to a week at room temperature. In cooler weather, they can last a bit longer. For camping, wrap them individually and keep them in a cooler if temperatures are warm.
Can I make these without peanut butter?
Yes, use sunflower seed butter or almond butter. If you use sunflower seed butter, note that it may react with baking soda if you add any, but this recipe doesn't use baking soda, so you're fine. Just ensure the butter is creamy and well-stirred.
Are these bars safe for toddlers?
They are soft and chewy, but check for choking hazards like whole nuts or large seeds. Chop nuts finely or use seed butters and omit whole nuts for younger kids. Always supervise toddlers while eating.
No-Bake Kids Granola Bars for Camping

These no-bake granola bars are a camping essential—easy to make, no oven required, and packed with oats, nut butter, and honey for energy on the trail.
- 2 cups old-fashioned rolled oats (not instant)
- 1 cup crispy rice cereal (or crushed cornflakes)
- 1/2 cup creamy peanut butter (or sunflower seed butter)
- 1/2 cup honey (or maple syrup for vegan)
- 1 teaspoon vanilla extract
- 1/4 cup mini chocolate chips (optional)
- 1/4 cup dried cranberries (or raisins)
- 1/4 teaspoon salt (optional)
- Line an 8x8-inch baking pan with parchment paper, leaving overhang on two sides.
- In a large bowl, combine oats and crispy rice cereal. Set aside.
- In a small saucepan over low heat, warm the peanut butter and honey, stirring until smooth. Remove from heat and stir in vanilla and salt.
- Pour the peanut butter mixture over the dry ingredients. Add chocolate chips and cranberries. Stir until everything is well coated.
- Transfer the mixture to the prepared pan. Press down firmly with a spatula or your hands (damp hands help prevent sticking) to compact it evenly.
- Refrigerate for at least 1 hour until firm. Lift out using the parchment and cut into 12 bars.
- Wrap each bar individually in parchment or plastic wrap for easy packing.
Recipe: No-Bake Kids Granola Bars for Camping
Ingredients
- 2 cups old-fashioned rolled oats (not instant)
- 1 cup crispy rice cereal (or crushed cornflakes)
- 1/2 cup creamy peanut butter (or sunflower seed butter)
- 1/2 cup honey (or maple syrup for vegan)
- 1 teaspoon vanilla extract
- 1/4 cup mini chocolate chips (optional)
- 1/4 cup dried cranberries (or raisins)
- 1/4 teaspoon salt (optional)
Instructions
- Line an 8x8-inch baking pan with parchment paper, leaving overhang on two sides.
- In a large bowl, combine oats and crispy rice cereal. Set aside.
- In a small saucepan over low heat, warm the peanut butter and honey, stirring until smooth. Remove from heat and stir in vanilla and salt.
- Pour the peanut butter mixture over the dry ingredients. Add chocolate chips and cranberries. Stir until everything is well coated.
- Transfer the mixture to the prepared pan. Press down firmly with a spatula or your hands (damp hands help prevent sticking) to compact it evenly.
- Refrigerate for at least 1 hour until firm. Lift out using the parchment and cut into 12 bars.
- Wrap each bar individually in parchment or plastic wrap for easy packing.