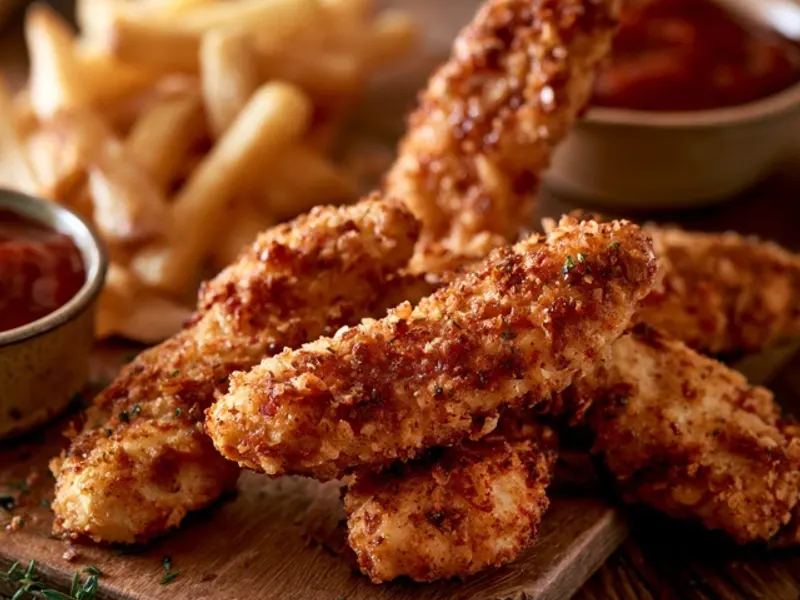
Simple Chicken Tenders for Camping: Crispy, Easy, One-Pan
The smell of sizzling chicken over a camp stove is one of those simple pleasures that turns a good trip into a great one. There’s something about eating crispy tenders under a wide-open sky that makes them taste better than any restaurant version. This recipe is my go-to for nights when I want a hot, satisfying dinner without a pile of dishes. It’s a one-pan wonder that uses ingredients you likely already have in your camp pantry.

Why This Method Works
Most camping chicken recipes call for deep frying or a messy multi-step breading process. This one keeps it simple: a single cast iron skillet, a modest amount of oil, and a quick double-coat in seasoned flour and egg. The result is a crunchy crust that holds up to the heat of a camp stove, without the fuss of a thermometer or a deep pot of oil. Plus, you can use the same skillet for a side of foil-wrapped veggies or a quick pan sauce.
Prep Tips for Camping
If you’re like me, you want to spend less time cooking and more time by the fire. The trick is to do as much as possible at home. Cut the chicken into strips and store them in a zip-top bag with a little marinade or just plain—they’ll stay fresh in a cooler with ice packs for up to two days. You can also mix the dry coating in a small jar or container, so at camp you just shake and dip.
Another pro move: pre-beat the eggs at home and keep them in a leak-proof bottle. That saves a bowl and a whisk. When you’re set up, all you need is a flat surface, a clean cutting board (or a paper plate), and your skillet.
Step-by-Step: The One-Pan Tender
1. Set Up Your Coating Station
Find a stable surface—a picnic table works great. Lay out two shallow bowls: one with the seasoned flour, one with the beaten eggs. If you have a third bowl, you can do the classic flour-egg-flour method for an extra crispy crust, but two is enough for a satisfying crunch.
2. Coat and Rest
Pat the chicken tenders dry with a paper towel. This is non-negotiable—moisture is the enemy of crispiness. Dredge each tender in the flour, shake off the excess, then dip in the egg, and back into the flour. Press lightly so the coating sticks. Place them on a plate and let them rest for five minutes. This rest period is the secret to a coating that doesn’t slide off in the pan.
3. Heat the Skillet Right
Place your cast iron skillet on the camp stove over medium heat. Add just enough oil to coat the bottom—about a quarter cup. Let it heat until it shimmers but doesn’t smoke. If you see smoke, the oil is too hot; turn it down a notch. You want a gentle sizzle when the chicken hits the pan, not a violent splatter.
4. Cook in Batches
Add the tenders in a single layer, leaving space between them. Overcrowding drops the oil temperature and makes the coating soggy. Cook for four to five minutes per side, flipping gently with a spatula. The tenders are done when they’re golden brown and the internal temperature hits 165°F (74°C). If you don’t have a thermometer, cut into the thickest piece—the juices should run clear.
5. Drain and Serve
Transfer the cooked tenders to a plate lined with paper towels to absorb excess oil. Let them rest for three minutes—this keeps the crust crisp. Serve with your favorite dipping sauce: honey mustard, barbecue, or a simple squeeze of lemon.
Adapting for Wind and Rain
Camp cooking often means dealing with the elements. If it’s windy, set up a windbreak using a cooler or a camp chair to shield the stove. Rain? Use a canopy or tarp overhead, but make sure there’s good ventilation—never cook inside a tent or enclosed space. Carbon monoxide from camp stoves is a real danger, so always keep the stove in an open area.
Campfire Variation
If you’re cooking over a campfire, use a grate set over hot coals, not flames. Wait until the coals are glowing orange with a light ash. Place the skillet on the grate and follow the same steps, but be ready to adjust heat by moving the skillet to a cooler part of the grate. Always use heat-resistant gloves—the skillet handle gets dangerously hot.
Cleaning Up the Smart Way
One of the best parts of this recipe is the easy cleanup. While the skillet is still warm (but not too hot), pour in a little water and scrape with a wooden spoon to loosen any stuck bits. Let it cool, then wipe with a paper towel. Cast iron shouldn’t be scrubbed with soap—just rinse and dry, then rub a thin layer of oil to keep it seasoned. For the coating bowls, a quick wipe with a paper towel before washing saves water and effort.
Safety Notes
Always keep raw chicken separate from cooked food and wash your hands after handling. Store leftovers in a cooler below 40°F (4°C) within two hours of cooking. If you’re in bear country, pack out all food scraps and store any leftovers in a bear-proof container or hang them away from your sleeping area.
Takeaway
Simple chicken tenders are proof that camp cooking doesn’t have to be complicated. With a little prep and one skillet, you can have a hot, crispy dinner that feels like comfort food, even in the middle of the woods. The key is to keep it simple: dry chicken, a good coating, and a properly heated pan. That’s it. Now go enjoy your evening by the fire—with a plate of tenders in hand.
Frequently Asked Questions
Can I make these chicken tenders without a camp stove?
Yes. Use a campfire grate or a cast iron skillet directly over hot coals (not open flames). Place the skillet on a bed of coals for even heat. Keep a spray bottle of water handy to control flare-ups, and use heat-resistant gloves to handle the skillet.
How do I keep the breading from falling off while cooking?
Pat the chicken completely dry before coating. Let the coated tenders rest for 5 minutes on a plate so the flour mixture can adhere. Use a spatula to flip gently, and don't crowd the pan—cook in batches if needed.
Can I prep these at home before camping?
Absolutely. Cut and coat the tenders at home, then store them in a sealed container with parchment paper between layers. Keep them in a cooler with ice packs. Cook within 24 hours for best texture. If you freeze them, thaw in the cooler before cooking.
Simple Chicken Tenders for Camping: Crispy, Easy, One-Pan

Crispy, golden chicken tenders made in a single cast iron skillet on a camp stove or fire. Uses a simple flour-and-seasoning coating and a small amount of oil for a crunchy exterior without deep frying.
- 1.5 pounds chicken tenders (or chicken breasts cut into strips) (Pat dry before coating)
- 1 cup all-purpose flour
- 1 teaspoon garlic powder
- 1 teaspoon smoked paprika
- 1 teaspoon salt
- 0.5 teaspoon black pepper
- 2 large eggs (beaten)
- 0.25 cup vegetable oil (or other high-smoke-point oil) (for frying, plus more as needed)
- Prep the chicken: Pat the tenders dry with paper towels. If using chicken breasts, cut them into 1-inch strips.
- Set up the coating station: In a shallow bowl, mix flour, garlic powder, smoked paprika, salt, and pepper. In another shallow bowl, beat the eggs.
- Coat the chicken: Dip each tender into the flour mixture, shake off excess, then dip into the egg, and back into the flour. Press the flour gently to adhere. Place coated tenders on a plate and let rest for 5 minutes.
- Heat the skillet: Place a cast iron skillet on a camp stove over medium heat. Add the oil and let it shimmer but not smoke.
- Cook the tenders: Add a single layer of tenders to the skillet, making sure not to overcrowd. Cook for 4-5 minutes per side, until golden brown and the internal temperature reaches 165°F (74°C). Flip gently with a spatula.
- Drain and rest: Transfer cooked tenders to a paper-towel-lined plate to drain. Let rest for 3 minutes before serving. Repeat with remaining tenders, adding more oil if needed.
Recipe: Simple Chicken Tenders for Camping: Crispy, Easy, One-Pan
Ingredients
- 1.5 pounds chicken tenders (or chicken breasts cut into strips) (Pat dry before coating)
- 1 cup all-purpose flour
- 1 teaspoon garlic powder
- 1 teaspoon smoked paprika
- 1 teaspoon salt
- 0.5 teaspoon black pepper
- 2 large eggs (beaten)
- 0.25 cup vegetable oil (or other high-smoke-point oil) (for frying, plus more as needed)
Instructions
- Prep the chicken: Pat the tenders dry with paper towels. If using chicken breasts, cut them into 1-inch strips.
- Set up the coating station: In a shallow bowl, mix flour, garlic powder, smoked paprika, salt, and pepper. In another shallow bowl, beat the eggs.
- Coat the chicken: Dip each tender into the flour mixture, shake off excess, then dip into the egg, and back into the flour. Press the flour gently to adhere. Place coated tenders on a plate and let rest for 5 minutes.
- Heat the skillet: Place a cast iron skillet on a camp stove over medium heat. Add the oil and let it shimmer but not smoke.
- Cook the tenders: Add a single layer of tenders to the skillet, making sure not to overcrowd. Cook for 4-5 minutes per side, until golden brown and the internal temperature reaches 165°F (74°C). Flip gently with a spatula.
- Drain and rest: Transfer cooked tenders to a paper-towel-lined plate to drain. Let rest for 3 minutes before serving. Repeat with remaining tenders, adding more oil if needed.