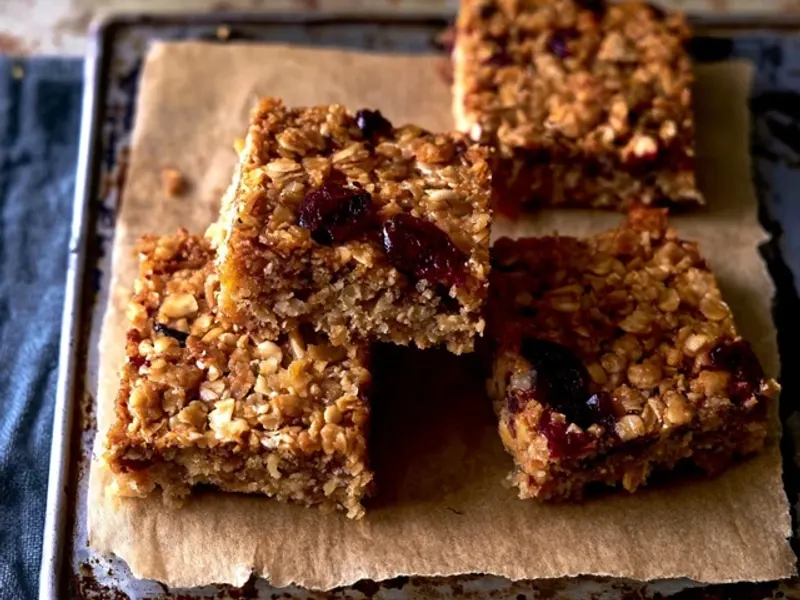
Trail-Smart Kids Granola Bars for Camping
The morning air at camp has that crisp, piney bite that makes you want to move. But before you can get the tent zipped open and the stove going, there's a hungry kid tugging at your sleeve. That's where a quick kids granola bar saves the day. Not the crumbly, sticky mess from the store, but a bar you made yourself—one that holds its shape in a backpack and doesn't melt into a puddle by noon.

These no-bake bars are my go-to for camping because they're forgiving, fast, and actually work. They're chewy, not hard, and they don't crumble into a million pieces when little hands grab them. Plus, you can make them at home in fifteen minutes, wrap them up, and toss them in the cooler. No oven required, which means no heating up the kitchen on a hot day.
Why These Bars Work Better at Camp
I've tried a dozen granola bar recipes over the years. The ones that fail at camp are usually too crumbly or too sticky. The secret is the ratio of wet to dry ingredients. Too much nut butter and they're greasy; too little honey and they fall apart.
This recipe uses a 1:1 ratio of nut butter to honey, which creates a binder that firms up in the fridge and stays solid at room temperature. The crispy rice cereal adds a light crunch that kids love, and it also helps absorb moisture so the bars don't turn into a soggy mess.
One trick I always use: press the mixture into the pan with a piece of parchment paper. Press hard, really hard. The more compact the mixture, the better it holds together when you cut it. I press for a full minute, using my palms to flatten every corner.
Make-Ahead and Packing Tips
Make these bars the night before you leave. Wrap each bar individually in parchment paper or place them in a single layer in a hard-sided container. Avoid plastic bags—they crush easily and the bars can break.
For a warm-weather trip, I pack the bars in a small cooler with a frozen water bottle. The bottle acts as a cold pack, and by the time it thaws, the kids have cold drinking water. Just wrap the bottle in a cloth so it doesn't get the bars wet.
If you're hiking, put the bars in the top pocket of your pack, not at the bottom under heavy gear. They'll stay intact and be easy to grab when a meltdown looms.
Adapting for Your Family
This recipe is a base, not a rule. For nut-free campsites, swap the peanut butter for sunflower seed butter. The flavor is slightly different, but it works just as well. If your child has a seed allergy, try tahini—but note it's a bit more bitter, so add an extra teaspoon of honey.
For a softer bar for toddlers, use quick oats instead of rolled oats and grind the oats in a food processor for a few seconds. You can also skip the crispy rice cereal and use extra oats. The texture becomes more like a soft granola bite.
Want to add mix-ins? Dried fruit, coconut flakes, or chia seeds all work. Just keep the total mix-ins to half a cup so the bars stay together. Chocolate chips are a favorite, but they can melt in warm weather. If you're camping in summer, skip them or press them into the top after the bars have set—they'll stay more intact.
The Common Mistake to Avoid
The biggest mistake I see is not pressing the mixture firmly enough. You have to be aggressive. If the mixture looks loose, add a tablespoon of honey or a splash of water. If it looks too wet, add an extra quarter cup of oats. The mixture should clump together when you squeeze it in your hand.
Another mistake is cutting the bars too soon. Let them chill for at least an hour. If you cut too early, they'll crumble. I've learned that the hard way—now I always set a timer.
Keeping Them Fresh at Camp
These bars will last three to four days at room temperature, but if you're camping in the heat, store them in a cooler to be safe. At night, keep them in a sealed container inside your bear canister or hung with your food. Yes, bears love granola bars too. Always follow local food storage guidelines.
When you're ready to serve, just hand them out. No plates, no forks, no cleanup. That's the beauty of a good granola bar.
The Takeaway
Quick kids granola bars don't have to be a compromise. With the right ratio and a little pressing, you can make a bar that's sturdy, tasty, and perfect for the trail. Make a batch this weekend, wrap them up, and you'll have a snack that's ready when the adventure starts.
Frequently Asked Questions
How do I keep granola bars from melting in my backpack?
Pack them in a hard-sided container and keep them in the shade. For hot weather, use a frozen water bottle as a cold pack wrapped in a cloth. Avoid leaving them in direct sun.
Can I make these granola bars without a food processor?
Yes! Use a zip-top bag and a rolling pin to crush the oats and nuts, or simply use quick oats and very finely chopped nuts. The texture will be a bit different but still delicious.
Are these granola bars safe for toddlers?
For toddlers under 4, skip the whole nuts and seeds. Use sunflower seed butter instead of peanut butter, and add finely ground oats for a softer bar. Always check for choking hazards.
Trail-Smart Kids Granola Bars for Camping

These no-bake granola bars are chewy, not crumbly, and hold up well in a camp pack. Made with oats, nut butter, and honey, they're a quick kids granola bar that won't melt in warm weather.
- 2 cups old-fashioned rolled oats
- 1 cup crispy rice cereal
- 1/2 cup sunflower seed butter or peanut butter (use sunflower for nut-free)
- 1/2 cup honey or maple syrup
- 1 teaspoon vanilla extract
- 1/4 cup mini chocolate chips (optional, add after cooling)
- Line an 8x8-inch baking pan with parchment paper, leaving overhang on two sides.
- In a large bowl, combine the oats and crispy rice cereal.
- In a small saucepan over low heat, warm the nut butter and honey, stirring until smooth. Remove from heat and stir in vanilla.
- Pour the wet mixture over the dry ingredients and stir until everything is well coated.
- Press the mixture firmly into the prepared pan. Use a piece of parchment paper to press down hard so the bars hold together.
- Refrigerate for at least 1 hour until firm.
- Lift out using the parchment overhang and cut into 12 bars.
- Store in an airtight container. If adding chocolate chips, press them into the top after cutting.
- Pack for camping in a hard-sided container to prevent crushing.
Recipe: Trail-Smart Kids Granola Bars for Camping
Ingredients
- 2 cups old-fashioned rolled oats
- 1 cup crispy rice cereal
- 1/2 cup sunflower seed butter or peanut butter (use sunflower for nut-free)
- 1/2 cup honey or maple syrup
- 1 teaspoon vanilla extract
- 1/4 cup mini chocolate chips (optional, add after cooling)
Instructions
- Line an 8x8-inch baking pan with parchment paper, leaving overhang on two sides.
- In a large bowl, combine the oats and crispy rice cereal.
- In a small saucepan over low heat, warm the nut butter and honey, stirring until smooth. Remove from heat and stir in vanilla.
- Pour the wet mixture over the dry ingredients and stir until everything is well coated.
- Press the mixture firmly into the prepared pan. Use a piece of parchment paper to press down hard so the bars hold together.
- Refrigerate for at least 1 hour until firm.
- Lift out using the parchment overhang and cut into 12 bars.
- Store in an airtight container. If adding chocolate chips, press them into the top after cutting.
- Pack for camping in a hard-sided container to prevent crushing.